asdf
asdf
To speed things up, here's a list of websites for Germany's diplomatic missions sorted by alphabetical order:
- Albania: https://tirana.diplo.de/
- Argentina: https://buenos-aires.diplo.de/ar-es
- Australia: https://australien.diplo.de/au-en
- Austria: https://wien.diplo.de/
- Belgium: https://bruessel.diplo.de/
- Brazil: https://brasil.diplo.de/br-pt
- Bulgaria: https://sofia.diplo.de/
- Canada: https://canada.diplo.de/
- Chile: https://santiago.diplo.de/
- Czech Republic: https://prag.diplo.de/
- Denmark: https://kopenhagen.diplo.de/
- Estonia: https://tallinn.diplo.de/
- Finland: https://helsinki.diplo.de/
- France: https://allemagneenfrance.diplo.de/fr-de/vertretungen/botschaft
- Greece: https://griechenland.diplo.de/gr-de/vertretungen/botschaft
https://www.nomadenberlin.com/german-immigration-directory
Lorem ipsum dolor sit amet, consectetur adipiscing elit, sed do eiusmod tempor incididunt ut labore et dolore magna aliqua. Ut enim ad minim veniam, quis nostrud exercitation ullamco laboris nisi ut aliquip ex ea commodo consequat. Duis aute irure dolor in reprehenderit in voluptate velit esse cillum dolore eu fugiat nulla pariatur. Excepteur sint occaecat cupidatat non proident, sunt in culpa qui officia deserunt mollit anim id est laborum.
asdf
asdf
The Working Holiday Visa is a type of residence permit that is specifically for young people between the ages of 18 and 30 years old (35 for Canadians). There are other names for this residence permit as well: Working Holiday Agreement, Youth Mobility Visa, and Working Holiday Visa Programme. Effectively, they are all the same thing with some small differences.
The purpose of the Working Holiday Visa is to create a bilateral opportunity for young people from two countries to experience each other's cultures and to develop a mutual understanding. Unlike most residency permits, there are no professional qualifications or requirements needed to qualify.
Germany has a Working Holiday Visa agreement with:
While there's a distinct difference between a visa and a residence permit, the Working Holiday Visa exists on a blurry line in between both. A visa typically is for less than 90 days and does not require you to work, while a residence permit is typically for longer than 90 days and expects you to work — the Working Holiday Visa is for a year, but does not require you to work if you don't want to.
The German word “Bürgeramt” refers to the citizens’ office. It is a compound word combining “Bürger” (citizen) and “Amt” (office). Most people are familiar with the Bürgeramt as the place where you register your address. This process is called Anmeldung.
There are many types of “Ämter” (the plural form for “Amt) in Germany, such as:
- Finanzamt: the tax office
- Arbeitsamt (now called the Agentur für Arbeit): the employment office
- Ausländeramt (more commonly referred to as the Ausländerbehörde): the foreigners’ office
These are examples of government offices to assist with the everyday life of German citizens and expats alike.
Where can I find a Bürgeramt?
Your city’s website is the best way to find your nearest Bürgeramt. For example, Berlin.de features a list that displays all the Bürgeramt locations for Berlin. They are categorized according to the 12 districts in Berlin, making it easy to find one close to you.
Every city and town in Germany has at least one Bürgeramt. The exact number depends on several factors, such as the size of the city and its population. In Berlin alone, there are over 40 Bürgeramt locations.
You can visit any Bürgeramt location, regardless of where you live. However, not all locations offer the same services, so you should check before making an appointment.
Most Bürgeramt locations require you to book a time in advance, however some offices also allow walk-in appointments.
How to get an appointment at the Bürgeramt
Booking an appointment at the Bürgeramt is typically done online or by phone. Some locations also allow walk-in appointments.
Booking an appointment online
Booking an appointment online is possible through your city’s website. In Berlin, you can book an appointment through the Berlin.de website. However, there may be a shortage of appointments in popular cities such as Berlin. It may take a few tries before you finally get one.
The best times to check for an appointment are between 5:00 to 19:00. This is when available appointments for the day are released to the public. More appointments are sometimes released throughout the day.
Booking an appointment by phone
Booking an appointment at the Bürgeramt is possible by calling the Bürgeramt hotline called the “Bürgertelefon”. Simply dial “115” from a Berlin landline or from a mobile phone registered within the Berlin metropolitan area.
If you live in a different part of Germany, the Berlin Bürgertelefon hotline can be reached with the area code “030”. You will need to dial “030115” instead of “115”. The Bürgertelefon can also be contacted from abroad by adding the German country code before dialling. The number is “+4930115.
The Bürgertelefon is available Monday to Friday, from 7:00 to 18:00 CET.
Most Bürgertelefon operators only speak German. Some may respond to English, but it would be a better idea to ask a German-speaking friend to call on your behalf.
Other services available at the Bürgeramt
In addition to registering your apartment, the Bürgeramt also processes the following requests:
For foreigners
- Deregistration of an apartment
- Transferring a residence permit to a new passport
- Transferring the EU Blue Card to a new passport
- Converting a non-EU driving license to a German driving license
For German citizens
All Bürgeramt services can be booked through the website or Bürgertelefon.
FAQ
Below are some commonly asked questions about the Bürgeramt.
Can I reschedule or cancel my appointment at the Bürgeramt?
Yes. It is possible to cancel or reschedule your appointment at the Bürgeramt. You will have to find the “Vorgangsnummer” (transaction number) and an “Absagecode” (cancellation code) on your email confirmation. Enter these two numbers into the system to reschedule or cancel your appointment.
Do I need to speak German at the Bürgeramt?
Typically, yes. Since German is the official language of the country, most government workers are not obliged to speak in any other language other than German. While some case workers are kind enough to speak English, it is not common practice and should not be expected. If you don’t speak German, it is best to take a German-speaking friend or a translator with you.
Can I get my passport picture taken at the Bürgeramt?
Sometimes. A number of Bürgeramt locations offer an instant photo booth where you can have your passport picture taken. This is indicated by the phrase “Ein Fotoautomat ist vorhanden” on the Bürgeramt’s website.
What are the opening hours for the Bürgeramt?
Every Bürgeramt has different opening hours. The typical opening hours run from 07:30 to 15:30 or 08:00 to 15:00. Some Bürgerämt locations are even open on Saturdays with shorter hours from 09:00 to 13:00.
Something
What is a visa?
A visa is a document that allows an individual to enter and stay in a country for a certain period of time. Similar to a residency permit, it acts as proof that the individual is allowed to stay in the country.
Unlike a residency permit, visas are typically for a time period of less than 90 days. These two concepts are often confused by colloquial terms such as "freelancer visa", which is actually a residency permit.
Typically, visas need to be applied for at the German embassy in your country before arriving in Germany. Some countries such as Australia, Canada, Israel, Japan, New Zealand, South Korea, and the USA are exempt from this rule, and can stay in Germany for 90 days without a visa. EU passport holders are also exempt from requiring a visa.
What is a residency permit?
A residency permit is a document that allows an individual to stay in a country for an indefinite period of time. Similar to a visa, it acts as proof that the individual is allowed to stay in the country.
Unlike a visa, a residency permit is typically for a period of more than 90 days. These two concepts are often confused by colloquial terms such as "freelancer visa", which is actually a residency permit. Residency permits are usually tied to some reason to stay in Germany, such as employment, freelancing, studying, or family reasons.
Residency permits can be applied for at the Ausländerbehörde in various German cities, although this also requires a visa to be in the country in the first place. Residency permits can also be applied for at the German embassy in your country before leaving for Germany.
The German word "Anmeldung" literally translates to "registration" in English. It commonly refers to the process registering your home address. The Anmeldung process can be done at any Bürgeramt in the city. On Berlin.de, the process is called “Anmeldung einer Wohnung”. This is also where you can book your appointments.
It’s worth keeping in mind that the uncapitalized version of “anmeldung” is used in many other situations as well, such as registering at a university or signing up at a website.
Why do you need to register?
When you register your address, you receive a document called Anmeldebestätigung. This is your certificate of registration. Aside from your passport, your Anmeldebestätigung is the most important document that you will have in Germany.
You will need your registration certificate in order to open a bank account in Germany, sign up for health insurance, buy a SIM card, and any other agreement that requires a contract. Normal activities become very difficult without an Anmeldebestätigung (or a Meldebescheinigung).
If this is the first time you’re registering your address in Germany, you'll also be able to get your Steueridentifikationsnummer in the same appointment. This is also called a Steuer-ID, which is your individual tax number. You will need to provide this to your employer when you get a job and start employment.
You may also be asked about your religion during the Anmeldung process, for Kirchensteuer (church tax) purposes.
Who needs to get an Anmeldung?
As a general rule, anyone intending to stay in Germany for longer than three months must get an Anmeldung within 14 days of arrival. This also means that you will officially become a resident of Germany. It is a compulsory legal requirement for all residents to anmelden (register).
There are some exceptions, such as:
- If you intend to stay for less than three months (e.g. tourists). Most tourist visas in Germany are limited to 90 days.
- If you're registered elsewhere in Germany, and you don't intend to stay in another city for longer than six months.
The official rule is to register within 14 days from the date of arrival, with possible fines of up to 1000€. However, this is rarely enforced in practice. Finding a flat takes time and Bürgeramt appointments are often booked out, so it's unlikely that you'll have a problem with registering a little late, unless the delay was intentional.
How to get an Anmeldung
The Anmeldung process can be done at any Bürgeramt in the city. If successful, you will be provided with an Anmeldebestätigung (registration certificate).
Here's how to register in Berlin:
- Book an appointment at the Bürgeramt.
- Prepare the forms Anmeldung bei einer Meldebehörde and Wohnungsgeberbestätigung.
- Go to your appointment with a valid form of identification.
The process is similar in most cities around Germany. The correct instructions and forms for your city on the city's website, such as Berlin.de. The Anmeldung process and appointment are free of charge.
A more in-depth guide for getting your Anmeldung is coming soon.
Where can I get my Anmeldung?
You can register at any Bürgeramt location in your city. You do not have to go to your local office. Booking in advance is advised and can be done on your city’s website. For example, people who live in Berlin can find appointments on Berlin.de. The type of appointment is called “Anmeldung einer Wohnung".
What is the difference between "Anmeldung" and "Ummeldung?
In practice, they are very similar. “Anmeldung" refers to the first address registration process, while "Ummeldung" refers to registering a change of address after you move. The appointment type ("Anmeldung einer Wohnung") and the actual process is identical.
What is the translation for "Anmeldung" in English?
The literal translation for the German word "Anmeldung" in English is "registration. Typically, this refers to registering your home address. Using the word "anmeldung" without capitalization refers to registration of any kind, such signing up for a website or registering for university.
What documents do I need for Anmeldung?
You will need to bring a valid form of ID and fill out the forms "Anmeldung bei einer Meldebehörde" (registration form) and "Wohnungsgeberbestätigung" (proof that you've moved in). If you are married, you may also need to bring your marriage certificate.
After moving to Berlin in 2017 with the intention of enjoying the summer before moving on, like many, I ended up staying. Along the way, I've made a whole heap of mistakes and sharing what I've learned to help hundreds of people move here as well.
Note: I'm working on a more comprehensive version of this guide, so be sure to come back and have a look! I'll be covering topics around all of the problems that expats typically face when they first move to Berlin.
Getting a Visa
Most people moving to Berlin typically have one of three visas: the Working Holiday Visa, Freelance Visa, or Employment Visa. I've personally gone through and written extensively about the Working Holiday Visa and German Freelance Visa, but you can find the official information about visas at the Foreigner's Registration Office website (Ausländerbehörde).
Depending on your passport, visa applications can be made after arriving in Germany. If you have a passport from a particular set of countries, you can also get a visa waiver with 90 days of free movement on arrival within the Schengen Zone (which includes Germany). This gets you some time to get your documents together.
If you don't have this visa waiver, you might have to do your own research on how the visa application process will work for you. The most likely scenario is that you'll have to apply at your local German embassy.
Getting Health Insurance
A compulsory part of living in Germany - including the visa application process - is having health insurance. Regardless of whether you're on a Working Holiday Visa, Freelance Visa, or Working Visa, the team over at Feather Insurance will be able to answer all of your questions about health insurance.
Almost all insurance companies in Germany do not operate in English, and certain types of workers (e.g. freelancers) are even more restricted with their health insurance options. One freelancer-friendly option that operates in English is Ottonova (see: Ottonova review), but Feather Insurance has a partnership with them as well - so I'd suggest for most people to start by booking a free consultation with Feather first.
Opening a Bank Account
Here's your first Catch-22. You'll need a bank account to get an apartment, but you can't get an apartment without a bank account. This is because most banks will require an Anmeldebestätigung and/or Meldebescheinigung - basically, a certificate of registration to a permanent address.
Also see: How to Open a Bank Account in Berlin
Fortunately, N26 does not require these documents and they also happen to be the only fully English-speaking bank in Germany. Their basic account also has no account fees or ATM fees - but this can be upgraded to their premium cards that include travel insurance, free ATM withdrawals worldwide and other exclusive discounts.
Need Euros? Use TransferWise to convert the currency of your choice and send it to your brand new N26 account. They offer rates that are much, much cheaper than any bank or foreign exchange service can offer, and the conversion is quick and 100% online through their website.
Getting a SIM Card
For most people, winSIM represents the best value for money and has no minimum contract. In Berlin, winSIM's network has the added bonus of working inside the U-Bahn as well - no other network has this functionality.
For more information, I've written a more comprehensive guide for getting a SIM card in Germany.
Finding a Job
Since Berlin is a very international city, it's very possible to find jobs that only require you to speak English (though it's always a good idea to learn German, especially if you'll be staying for a while).
Here are the best places to begin your search:
- Indeed.com: Job search engine with alerts feature.
- LinkedIn: Use the filter function to search by city and job title.
- Xing: The German equivalent to LinkedIn.
- Glassdoor: Job boards and company reviews.
- AngelList: Start-up jobs portal, very active in Berlin.
- Berlin Startup Jobs: Berlin-specific start-up jobs.
- English Jobs in Berlin: Facebook group for English job seekers.
- Berlin Freelancers: Advice sharing and job postings for freelancers.
- Berlin Food Stories: Food blog with hospitality job postings.
- Huntler: Bar, cafe and other hospitality jobs in Berlin.
Finding a Flat
The housing shortage in Berlin is a topic that is commonly discussed amongst Berliners, and rising rent prices are a hot topic in any conversation. That being said, Berlin is still significantly cheaper than London or Paris, and is even cheaper still than most of its other German sister cities.
Here are the best places to begin your search:
- eBay-Kleinanzeigen: Classifieds ads for finding housing.
- WG-Gesucht: Classified ads for housing and shared flats.
There are also dozens of Facebook groups, including:
- WG-Zimmer & Wohnungen Berlin: 153,000+ members.
- WG, Zimmer und Wohnung in Berlin: 82,000+ members.
- Berlin Apartments: 81,000+ members.
- Apartments/roommates in Berlin: 17,000+ members.
- WG Zimmer Wohnung in Berlin: 26,000+ members.
For temporary stays, Airbnb is a good option:
- Airbnb: new members get 38€ credit with this link.
It's not uncommon for people to move around a few times before finding a permanent home, and don't let the high demand in areas such as Kreuzberg, Neukölln and Friedrichshain discourage you - a lot of it comes down to luck.
Employer-sponsored visas can be found in a lot of countries, but Germany is one of the few places in Europe that issues visas for freelancers. Among these, Berlin in particular has turned into one of the most popular European hubs for freelancers, remote workers and digital nomads. It's not just programmers either - for decades, artists have been flocking to Berlin in droves for decades.
This means that living a freelancer in Berlin has never been easier, but the spike in German freelance visa applications also means that the process has become increasingly strict over time.
I went through my freelance visa application last week and learned that despite all my preparation, I had screwed up - badly. To the point of nearly having to leave the country. All this, because of tiny details in the bureaucratic process that no amount of time or advice could have prepared me for.
But despite all that, I still came out with a 2-year German freelance visa.
Below, I've detailed my experience so that future freelancers don't make the same mistakes I did. An added bonus (for you, anyway) is the valuable insight into the freelance visa process that I wouldn't have been able to learn about if everything went smoothly. After all, no one says anything when you've done things right, but people are very quick to point out what you've done wrong - often, in excruciating detail.
Note: there are some quick links in the sidebar that isn’t visible on mobile devices. For the full experience, be sure to check out this article on a larger screen.
What is the German Freelance Visa?
The German freelance visa is officially called "Residence permit for a freelance employment - Issuance", otherwise known as "Aufenthaltserlaubnis zur freiberuflichen Tätigkeit - Erteilung". German can sound so inviting, sometimes.
Also see: How to Apply for a German Working Holiday Visa in Berlin
The freelance visa is typically 1-3 years in duration and allows you to live and work freely in the profession of your choosing within Germany, as well as allowing you to travel (more or less) as you like inside the Schengen Zone.
Perhaps the simplest way to describe the German freelance visa is "anyone who isn't employed by a company". This can effectively be broken down into three more categories: regular freelancers, self-employed people and artists.
The difference between a "regular freelancer" and a "self-employed person" is that freelancers work on multiple projects or contracts with different companies (e.g. a marketing freelancer), while a self-employed person effectively operates their own business (e.g. a founder, sole trader or managing director of a company). The two visas are roughly the same, but self-employed people have a couple of extra documents to provide.
On that note...
What is the German Freelance Artist Visa?
The so-called "artist visa" that many talk about is simply a subcategory of the "freelance visa". Officially, there's no such thing as an "artist visa".
Artists (e.g. artists, musicians, creatives, etc.) have a number of benefits such as cheaper artist's insurance and a lower tax rate, but are officially categorised as a "freelancer". There are also a couple of extra documents that artists need to provide which regular freelancers don't need to bother with - more on this later.
Requirements for a Freelance Visa in Germany
If you are not a citizen or a permanent resident of the European Union and want to work as a freelancer in Germany, you will need a freelance visa. While this is more time-consuming to obtain compared to the Working Holiday Visa (which I'd recommend doing instead, if you're eligible), it's still very doable.
For the official list of documents required, go to this link.
One key thing to mention is that the website (and other people's experiences) are not 100% accurate in detailing what you need to successfully get your German freelance visa. Yes, I know, it doesn't make any sense. I'll explain this in more detail below.
But before we do anything else, I'd suggest booking a visa appointment as soon as possible. Go to the official Service Berlin website, click on the "Make an appointment" link at the bottom of the page and fill out your details to see all open appointments.
At first glance, it's very likely that there'll be nothing available. Don't panic! Just keep checking early in the morning around 7am and throughout the day until you see a slot opens up. It'll be seemingly at random, but you'll find something that suits as long as you're persistent.
Demystifying the German Jargon
While going through this visa application process, there are a few words and phrases that you’ll often hear repeated. The most common ones you'll run into will be Anmeldung, Bürgeramt, Ausländerbehörde, and the names of a few forms you’ll have to complete.
What is “Anmeldung” and “Bürgeramt”?
Anmeldung is the process of registering yourself to a German address. This is a requirement of your visa (unless you apply from outside of Germany). The Bürgeramt is the local office where you can submit your Anmeldung forms.
To complete your Anmeldung, you’ll need two forms: the “Anmeldung bei der Meldebehörde” is the application form to register yourself at your primary residence, while the “Einzugsbestätigung des Wohnungsgebers” is a form that your landlord – or primary tenant – has to fill out to officially confirm that you now live at this address.
Both forms and more information can be found here (use Google Translate).
What is the “Ausländerbehörde”?
This is effectively the Foreigners Office that you’ll be dealing with. Here, you’ll need to bring the “Residence permit for a freelance employment - Issuance” form (Aufenthaltserlaubnis zur freiberuflichen Tätigkeit - Erteilung).
Booking a visa appointment can be notoriously competitive, but luckily for you, the freelance visa appointments are much easier to come by compared to other visas such as the Working Holiday Visa. This is because your appointment will be held at the "other" Ausländerbehörde at Friedrich-Krause-Ufer 24.
Once you get there, you'll most likely have to go Waiting Room E1.1 on Level 3 of Haus B, which is the second building on your right. Check your booking confirmation email to make sure you're going to the right place.
How to Apply for a German Freelance Visa in Berlin
Since this is the "Initial Issuance" part of the freelance visa (i.e. the first time you get it), your appointment is basically a short test to make sure that you:
- Have enough savings to support yourself financially. If you need a German bank account, N26 is your best bet (and operates fully in English). For a full guide on opening a bank account, click here.
- Have a plan on how to make money and create income streams.
- Have proof that you'll benefit the German economy (or at least, the local community).
- Have the correct (i.e. German) health insurance which is compulsory for all residents. If you're not sure about what's best for you, I highly recommend speaking with Feather Insurance - the only English-speaking insurance broker aimed at expats. They can hook you up with both public and private insurance options, as well as any other types of insurance you might need. Simply click here and book an appointment.
- Are someone that will have a positive impact (mostly economically) on Berlin/Germany.
My interviewer flat-out told me that the "Initial Issuance" visa interview is effectively "a quick review to see whether Germany should give this person a chance to prove themselves". Her words, almost word for word. By comparison, the German freelance visa renewal is much stricter as everything is run through a calculation of some sort (e.g. profit, loss, expenses, taxes, and so on).
This means that your application doesn't have to be perfect. And even if it isn't good enough to get your freelance visa, the Ausländerbehörde typically grants a grace period of anywhere between a few weeks or even months to sort yourself out.
Here's the short version on applying for a German freelance visa in Berlin:
- Book your Bürgeramt and Ausländerbehörde appointments as soon as possible.
- Arrive in Germany using the 90-day Schengen visa (no application required).
- Find a house, flat or shared flat, also known as a “WG” (or “Wohngemeinschaft”).
- Go to the Bürgeramt and complete your Anmeldung.
- Prepare all of your application documents (this may take a while).
- Go to the Ausländerbehörde and submit your visa application.
If you're already in Berlin or are coming off another visa, you can skip steps 2 to 4.
Step 1: Book Your Appointments
There's such a shortage of public service officers at the Bürgeramt, that you'll have to book your appointment at least a month or two beforehand. The Ausländerbehörde is even worse - it's often booked out for years in advance (no, you didn't read that wrong).
Book your Bürgeramt appointment using this link.
Since Ausländerbehörde appointments are quite competitive to get, the best thing to do is check the website early in morning, every day, until you find someone who's cancelled. Try and give yourself as much time as possible, but make sure it's within your 90-day Schengen window.
Book your Ausländerbehörde appointment using this link.
Get your appointments booked as soon as possible - the earlier the better! That being said, if you can't find an appointment before the expiry of your current visa (e.g. Working Holiday), you'll be fine as long as the appointment was booked before your visa expires.
Step 2: Arrive in Berlin
A lot of countries have an agreement with Germany that allows them to stay for 90 days out of a 6-month period without a visa. Project Visa has some useful links that shows each country's eligibility. If your country's passport isn't eligible for this, you won't able to apply for any sort of Working Holiday Visa using the method on this page.
Step 3: Find Accommodation in Berlin
This can be tricky. The rental market in Berlin is so high in demand that most listings will get dozens, if not hundreds of applications - especially in the more desirable areas. An extra layer of difficulty with this is that you'll need to sort out your Anmeldung, which a lot of temporary flats or sub-leases often can't provide.
Still, it's not impossible. Put some effort into your application, and show the landlord (or your future housemates) why you'd be a good fit.
You can find accommodation using a few methods:
- WG-Gesucht: the most popular website for finding houses, flats and share houses ("WG").
- Facebook Groups: join as many rental-related groups that you can find. Here are a few to get you started: Berlin Apartments, Flats in Berlin, Berlin Housing, WG Zimmer Wohnung in Berlin.
- eBay-Kleinanzeigen: German classifieds, sort of like Gumtree or Craigslist.
- Immowelt.de: another website for finding accommodation, where a lot of ads are by agents rather than landlords or tenants.
Also, try to ask around. Like job openings, a lot of WGs and flats don't get advertised due to referrals and friends of friends. Obviously, this can be difficult if you've just arrived, but it's something to keep in mind as you start meeting people.
Step 4: Go to the Bürgeramt (Anmeldung)
Don't be late for your appointment! While the booking process is a mess, the appointments tend to start precisely on time.
If you haven't managed to book your Bürgeramt appointment, you can try and find last-minute cancellations on the day, or simply go to your local office and wait in line. It's very possible to get a Bürgeramt appointment just by turning up.
Something to keep in mind is that while most officials at the Bürgeramt speak perfect English, they might get annoyed at the fact that you don't speak German. Bring all the documents you need already filled out, and be as nice as possible. If you can bring a friend that speaks German, you'll have a much easier time here.
Step 5: Prepare Your Visa Application (Forms, CV, etc.)
Everybody I've met who has had to go through the German freelance visa process has spent a fair amount of time panicking, but don't worry - the actual interview is quite simple. The most difficult (yet frustrating) part of the whole process is getting all the right documents together.
A quick note here: Germany typically doesn't accept the idea that someone can do more than one type of work at the same time. For example, it's not possible (in the eyes of the German government) for someone to freelance as a marketer but also work as a video producer and maybe do a little singing on the side. The best option here is to pick a title that is as vague as possible, while being specific enough (and with proof) that the Ausländerbehörde will accept it.
For example, I chose "Digital Strategy Consultant" which is incredibly vague and probably wouldn't work for most people, except for the fact that I've had jobs where I specifically held the title of "Digital Strategist", "Digital Manager" and "Digital Consultant". With this, I can now issue invoices for anything that falls under this umbrella - digital transformation, marketing, analytics, UX, and so on - but only by using my official title.
That being said, I've heard that you can apply for more than one title, but this means you need to produce double the amount of letters of intent and/or fee contracts (more on this below).
According to the website, this is the complete list of things you'll need:
Valid passport
This is self-explanatory. Also, make sure your passport doesn't expire halfway through the visa period you're applying for.
A current biometric photo
You must have one passport photo "35mm x 45mm, frontal shot with neutral facial expression and closed mouth, looking straight into the camera, light background".
You can get these either from a photography studio or from the many passport photo booths around Berlin, which is much cheaper. Look for the words "Photoautomat" or "Fotofix". You can even look up some of their locations in Google. Just make sure they're proper passport photo booths, not the art project ones around Berlin.
The form “Antrag auf Erteilung eines Aufenthaltstitels" (Application for Issuance of a Residence Permit)
Only required for a first-time application. You can find this form in the language of your choice by going here and scrolling down to the section labelled "Forms". Fill out everything and put your signature at the bottom.
Financing plan
This name is rather misleading, as it's actually more like a simple summary of your current savings and investments.
Also see: How to Open a Bank Account in Berlin, Germany
If you have money in a different currency, make sure to convert it to Euros before writing down the total sum. I used XE.com to do my conversion, and also took care to label the date of the exchange rate calculation.
Revenue forecast
Again, this name is a little inaccurate. It's a profit/loss sheet where you write down all of your expenses (e.g. rent, health insurance, etc.) and balance it against your potential income. Since it's impossible to predict exactly how much your income will be, you'll just have to come up with a number based on your previous related employment, or even just a gut feeling. They don't check this number against anything, but it needs to be realistic as it's meant to show the Ausländerbehörde that you can afford to live in Berlin.
There's also a strange, unstated requirement here that your rent must be lower than about 35% of your potential income. The example I was given was "700 Euros rent means over 2000 Euros in income", but I couldn't get an exact percentage.
Proof of other regular income*
Since artists are stereotypically poor, this section is meant to show the Ausländerbehörde that you're able to support yourself - either through other work (e.g. hospitality jobs, teaching, babysitting, etc.), past savings/investments, or even just someone who's willing to support you, such as a parent or a sponsor. You'll need to include this in your financing plan, and also provide a signed letter or some other form of proof as part of your application.
*Only applies for artists and language teachers. This is nice to have if you're any other type of freelancer, but not necessary.
Letter of intent for collaboration
If you want to work on a fee basis, you'll need at least two of what's called a "letter of intent for collaboration". This is simply a letter from a German company that states that they intend to hire you as a freelancer once you receive your freelance visa.
Since it's not a contract, it's not binding in any way - all it needs to prove is that a German business needs you (specifically) to be based in Germany (specifically) to help them using your freelance skill. This is to prove that you will be a benefit to the German economy. That also means that "European" isn't enough - they need to be a business incorporated in Germany.
Each letter should specify your title in the organisation (i.e. the same as the title you're applying for in your visa application), the scope of work, payment rates and a description of the work you'll be doing. Ideally, these should be written in German or with a German translation. It doesn't need to be an official translation - asking a friend to translate your letters onto another piece of paper is enough.
My interviewer didn't bat an eyelid at my English letters, but then again, her English was almost perfect - a rarity in most German bureaucratic offices. You might not get so lucky, so it's probably safest to get a translation organised. I simply ran out of time before my appointment.
Two letters is the minimum, but more is always better! I personally provided three. A friend of mine also carefully worded her recommendation letters to imply intent for future work, which may have helped a little.
Fee contracts
If you somehow have secured contracts already, bring these in. Since these are actual contractual agreements, they're far more valuable than letters of intent.
That being said, I really don't understand why they've listed this as a requirement, since you'll typically need a German freelance visa to secure any sort of contract. So if you haven't secured any fee contracts yet, the letters of intent above are enough - you can skip this section.
Curriculum vitae
Your CV will need to prove that you are qualified to do the work that you're getting your freelance visa for. Be sure to include any relevant details of your professional career, qualification certificates, diploma, references and/or sponsors as necessary. It's also a good idea to spell out your freelance work title at the top and throughout your CV to make it obvious what sort of work you're planning to do during your time in Berlin.
Professional permit
If a professional permit is required for your freelance occupation (e.g. a license to practice law, medicine, electrician, etc.), you will need to produce the original copy.
If you can't get an original copy, try and get a certified copy - or just a regular, printed copy if you can't obtain that. In the off chance that your interviewer has a problem with this, they'll tell you specifically what's required and provide a reasonable time frame (usually with a small visa extension) to organise a solution.
Health insurance
Whether you're a resident, freelancer, expat or anything else in between, health insurance is a compulsory requirement for anybody living in Germany. Travel insurance may be enough to satisfy the requirements of the Working Holiday Visa, but for the Freelance Visa, you'll need to get private health insurance.
As a freelancer from a foreign country, we're unfortunately very limited in terms of which health insurance provider we can choose. While "employees" get subsidised health insurance, we freelancers have to pay our own health insurance which is around €250-300 per month (depending on your age and other factors). Your visa is voided as soon as you cancel your health insurance, so there's really no way out of this.
The easiest way to find out what's best for you is to speak to Feather Insurance. They're an insurance broker by expats, for expats - and they operate in English and the insurance packages that they suggest are fully compliant with the Ausländerbehörde. Their service doesn't just stop at signing you up - they will continue to be your English-speaking point of contact to help you with any insurance-related issues down the track. Booking a consultation is free, so simply click on this link and book an appointment.
If you're an artist, there's an artist's association called "Künstlersozialkasse" (KSK) which reduces the amount of health insurance you need to pay for by 50%. Unfortunately, I didn't apply for my freelance visa as an artist, so I don't know much about this. Before joining the KSK, you'll need insurance anyway - so once again, I'd suggest speaking to Feather first.
Note: If you're an artist and had to go through this process, please let me know in the comments below and I will include your experience here!
Lease or proof of home ownership
You will need the original document that proves that you're renting or own the home you're living in. This will vary depending on your situation - simply ask your landlord or main tenant on how to get this document for your appointment. In my case, it was an official sublease document labelled "Untermietvertrag".
Rental cost / expenses for property
This is very simple if your contract is "warm" (i.e. all expenses included), in which case the document above covers all the bases. If your rental situation is "kalt" (i.e. expenses not included, or "cold"), you will have to produce statements for bills such as internet, electricity bills, and so on.
Adequate pension plan
This is only necessary if you are above the age of 45. Check the website for more details.
Proof of main residence in Berlin
You will need to prove your main residence in Berlin, which can be shown with either the lease document provided by your landlord or a certificate of registration at the main residence ("Meldebestätigung"). If you can't find these, your Anmeldung document should be sufficient.
Step 6: Go to the Ausländerbehörde
If you’ve made an appointment, this bit is easy – it’s a simple matter of arriving on time.
But if you haven’t managed to make an appointment, you’ll have to get to the Ausländerbehörde before it opens, write down your name, and hope they give you a ticket when they open. But if you're persistent with checking every morning, getting a visa appointment really shouldn't be a problem.
Step by step, here’s what you need to do:
- Get to the Ausländerbehörde at your scheduled appointment time. Make your way to Level 3 of Haus B, which is the second building on your right. Check your booking confirmation email to make sure you’re going to the right place. Don't be late, or you will automatically forfeit your spot!
- Wait for your number to come up on the screen.
- Give your documents to the person behind the counter. Try and be as friendly as possible. If you speak German (or have a friend that does), that’s a big plus. If not, send me a message here and let's see if we can organise a local that could help you out.
- They'll check that you've brought everything, then you’ll be asked to go back to the waiting room and wait for your number to be called out again.
- Wait.
- Receive your shiny new visa! You’ll have to pay a fee on the way out, so bring cash if you don’t have a IC card. Debit and credit cards won’t work.
- If you don't get your visa, they'll give you instructions on what was wrong with your application and give you some options on what to do next.
That's it.
My Personal German Freelance Visa Experience
Now that the nitty-gritty of the freelance visa application process is out of the way, I'm going to tell you a story about my experience. This cleared up a lot of the common advice (and confusion) that I was given before going to the Ausländerbehörde.
Spoiler alert: a lot of the advice was wrong, and it created a whole number of new problems for me.
Here's how it went.
At 6am on a freezing Tuesday morning, I set out with my German friend (to help with translations, but mostly for moral support) from Schöneberg to catch an early train to the Ausländerbehörde. I was nervous but ready, and had all my documents neatly organised into plastic sleeves in a green folder.
We made our way to the Ausländerbehörde at Friedrich-Krause-Ufe 24, spoke briefly to a very unhelpful man at the help desk, and walked into Haus B to the third floor. My email confirmation said Waiting Room E1.1 or E1.2, but E1.2 was totally empty so we made ourselves comfortable in E1.1, amongst a number of other sleepy, grumpy-looking people.
After about fifteen minutes of waiting, my number flashed on the screen so we gathered our things and made our way to our designated office. Sitting inside was a young-ish looking lady with a serious look on her face.
"Deutsch oder Englisch?" she asked.
Knowing that I didn't have to rely on my friend to translate, I relaxed. For about five seconds.
"Okay, English. So, first of all, I must tell you that you are in Germany illegally and will have to leave the country."
Good start.
Learn From My Mistakes: A Comedy of Errors
While all my documents were perfectly in order, my biggest mistake stemmed from the fact that I wasn't officially on the 90-day Schengen Zone Visa. This created a whole host of problems in a domino-like effect.
Here's how it went:
- My Working Holiday Visa had expired and I (thought I) was on my 90 Schengen days (I wasn't); which meant...
- I had overstayed my Working Holiday Visa; which meant...
- The visa appointment I had re-booked was made after the expiry of my WHV; which meant...
- I was not safe by the loophole of "book a visa appointment before your WHV expires and you'll be fine, even if it's outside your visa's expiry date"; which meant...
- I was therefore technically in Germany illegally; which meant...
- The police had come by my flat to see if I was home (I wasn't, thankfully); which meant...
- The visa application had become more complicated, since other official institutions had gotten involved in my affairs.
Let's dig into the details here.
Firstly, "Visa" vs "Residence Permit"
Although the terms "visa" and "residence permit" sound like the same thing, they're not. The difference is in the details.
A "visa" is what allows you to enter the country/region (such as the 90 day Schengen Visa), usually for a shorter period of time. Some countries such as Australia get this on arrival, whereas other countries such as India must apply for it in advance at the destination country's embassy.
By comparison, a "residence permit" is what allows you to stay in the country for a longer period of time, which is why many Australians, Americans, Canadians (and so on) typically arrive in Germany on a visa then apply for a residence permit.
It sounds almost like the same thing, and the confusion is exacerbated by the fact that most people say "Working Holiday Visa" and the "Freelance Visa" when they're actually talking about the "Residence permit for the purpose of attending the Working-Holiday- and Youth Mobility-Programme" and "Residence permit for a freelance employment".
I also use these terms interchangeably (sorry), purely because it's too time-consuming to try and explain the difference to someone who isn't interested in hearing about the finer technicalities of border bureaucracy (which is most people).
Keeping this in mind...
How the 90-Day Schengen Zone Visa Works
Some passports, such as my Australian one, allows tourists to stay in the Schengen Zone for up to 90 days without having to apply for a visa. Many expats believe - and told me - that I would automatically switch to my 90 Schengen days as soon as my Working Holiday Visa expired.
This was incorrect.
You must leave the Schengen Zone altogether and return to get a new stamp in your passport for the Schengen Visa to take effect. This can be a flight to literally anywhere outside of Schengen (e.g. London) and back on the same day. It's a purely a technicality.
If you don't leave the Schengen Zone and come back, you are officially in the country illegally. Like I was, unknowingly.
Booking an Appointment Before/After Your Residence Permit Expires
One way to get around this requirement is to book an appointment as soon as is possible through the website before your residence permit expires (e.g. Working Holiday Visa) - even if the appointment itself is after the expiry date. The Ausländerbehörde in Berlin understands that getting an appointment is highly competitive and is quite forgiving in this regard.
My problem was that I had booked my appointment during what I had thought were my 90 Schengen days (which had never officially started). If you do that, or, book your visa appointment after your previous visa expires, your status in Germany is officially illegal.
Booking an Appointment Outside Your 90-Day Schengen Visa
If you're coming off another residence permit (such as the Working Holiday Visa) and book your appointment before it expires, your permit to stay in the country is extended and you're in the clear. Simply go to your appointment and you should be fine. Just don't leave the country until your new visa is issued.
If you're in Germany on your 90-day Schengen Zone Visa and book an appointment for after it expires, this is a different story. This easy, on-arrival visa allows you to enter the Schengen Zone and travel freely for 90 days without having to apply for anything, but it also isn't a long-term visa, nor is it a residence permit. Once your 90 days are up, that's it - you're now technically in a black/grey area and it's totally up to the goodwill of your interviewer to accept your application or not.
There have been many reports of people overstaying their Schengen Visa days after being told to do so by a case worker at the Ausländerbehörde - or in some cases, even the security guard at the front of the office - and getting their new freelance visa without any problems. That being said, this is not official policy, so I would highly recommend getting this statement in writing. And definitely don't leave the country before your appointment as border security has no way of confirming your story!
Everybody (both official and anecdotal) has contradicting information on this, so the only surefire way of avoiding any problems is to either:
- Leave the Schengen Zone altogether and come back for your appointment (within your 90 days).
- Simply line up early in the morning around 8am and get a walk-in appointment.
While it's widely known that the residence permits have some wiggle room depending on your booking date, the Schengen Visa has no real leniency policy for late applications.
Berlin vs Other Cities in Germany
As far as a city's bureaucracy goes, Berlin is possibly the most relaxed city in Germany. This means that both the Bürgeramt and the Ausländerbehörde (unofficially) doesn't mind that much if you're a little late with your appointments, don't have a comprehensive set of all the required documents, and so on. This has a lot to do with Berlin's reputation as an international hub that attracts people from all walks of life, and they have an incentive to continue this trend.
Anywhere else in Germany (I was told by my interviewer), they most likely would not be so forgiving or understanding.
That being said, the fact that the police had been contacted and they had come by to my registered address meant that my visa application had become more complicated, with other official institutions getting involved. If this hadn't happened (I was told, once again), my lateness wouldn't have really been a problem.
Not All Passports Are Equal
Back to the story.
At this point, my friend had gone silent and I was internally panicking, though I kept a respectful tone while explaining my situation. My interviewer listened, and luckily sounded quite sympathetic with my misunderstanding of the Schengen laws and bureaucratic process - although her face was stone-hard and unforgiving.
"This makes sense. I will have to speak to my supervisor to see if it is still fine for me to process your visa application. Leave your documents here. If I don't call you back for a while, everything is probably fine and I will be processing your visa. If I call you back in a few minutes... we'll see."
I thanked her and we went back into the waiting room. Five of the most nervous minutes in my life slowly passed, and I started to feel hopeful. Nevertheless, I was looking through Google Maps on the phone to figure out my exit plan, just in case things went wrong.
After about twenty minutes, my number came up on the screen again, and we went back into the office to find my interviewer stamping my passport with a 2-year German freelance visa. Feeling relieved and now intensely curious, I asked her what had happened.
"You're lucky you have an Australian passport," she told me. "Germany has a good relationship with Australia, which means you have one of the few passports that are 'privileged' in this country. If you were from somewhere else, it's possible we would not be having this conversation."
I also learned - or rather, had confirmed - that these privileged nations include all of the EU/Schengen Zone, Australia, New Zealand, Israel, Japan, Canada, and (sometimes) the United States. By default, this means you have a better chance of being treated better and having minor problems overlooked.
That being said, I also know plenty of people from elsewhere who have successfully received their freelance visa without any problems, regardless of their passport. My situation was quite unique because of the number of mistakes that were made.
Temporary Visa Extension vs Getting Your Visa Instantly
While I got my visa straight away, most people I know received an extension first (usually for 3-6 months based off their Working Holiday Visa) while their documents got "reviewed". This is quite common, but the Ausländerbehörde is also very lazy at following up so it's a good idea to book another visa appointment close to the end of your visa extension date. "I didn't know" or "you didn't tell me anything" isn't an excuse when it comes to German bureaucracy.
This review process tends to happen more frequently for the subsection of freelance visa applicants in the middle ground between "artists" (DJs, dancers, visual artists, etc.) and "in-demand technical professionals" (programmers, software engineers, data scientists, etc.).
For those two categories above, your visa will likely be issued instantly. For everyone else, the German government is reviewing your application to see if there is a "demand for your skills" in Berlin.
Final Thoughts
There's a lot of scaremongering around the process for obtaining a freelance visa in Germany, but seriously, it's really not that difficult as long as you sort out your documents well in advance and don't mess around with technicalities in visa periods and Schengen Zones. The most difficult things to organise are your "letters of intent" and a portfolio - that's it.
Whether it's experimenting with the limits of flying one-way without proof of onward travel or buying multiple SIM cards to find out the best SIM cards for each country, I hope that my time spent as a human guinea pig helps you out, even if it's just a little bit. That being said, this freelance visa application process was one of the scariest ones yet!
Just don't be like me and you'll be fine 🙂
Other Things to Consider
Once you’ve finished the stressful process of settling in, you’ll probably want to set up a bank account and phone number. As far as bank accounts go, all expats (and even many locals) unanimously recommend N26 (N26 review), an online bank with no account fees and free withdrawals. Their app is easy to use, and more importantly for expats: it’s the only real English banking option in Germany. If you need to convert currencies, TransferWise is the fastest and cheapest option (by far!).
As for setting up a phone number, I’ve written guide on getting a SIM card in Germany. I’ve also written an article about various apps and services to help you navigate Berlin, mostly about the best ways of physically getting around. Although intended for tourists, the same services apply for those who have decided to make the move a bit more permanently. There are even a few referral codes in there to help you save a bit of cash! Let’s help each other out 🙂
If you’ve found any of my writing helpful, please be sure to link it to anyone you think might benefit from it.
Viel Glück und willkommen in Berlin!
This guide will help you understand the Working Holiday Visa application process, prepare your documents, and provide structure for your first steps in Germany. Bureaucracy in German can be confusing, but this gets easier once you understand the process.
What is the German Working Holiday Visa?
The German Working Holiday Visa is a one-year residence permit. Its main purpose is to encourage young people from a number of other countries to experience German culture and travel freely across Germany.
The Working Holiday Visa also allows you to work in Germany, although it is not mandatory. There are even some limits on how long you can work with each employer. This is different to most other residence permits, which require you to have a job or have a reason to be in Germany, such as attending university.
The following countries are eligible for the Working Holiday Visa:
- Australia
- Argentina
- Brazil
- Canada
- Chile
- Hong Kong
- Israel
- Japan
- New Zealand
- Republic of Korea (South Korea)*
- Taiwan
- Uruguay
*only when combined with another residence permit, such as a Residence permit for attending a language course.
This list is based on multiple official sources. Confusingly, each source is missing one or more countries. You should double-check to make sure that your country still has a Working Holiday Visa arrangement. For example, the agreement with the Republic of Korea has become stricter in the last few years.
Popular alternatives to the Working Holiday Visa are the:
- German Working Visa
- German Freelance Visa
- German Artist Visa*
- German Language Course Visa
- German Blue Card
*a variation of the freelance visa that only exists in Berlin.
Once their Working Holiday Visa has expired, many people move onto one of these visas to continue living in Germany.
Difference between a visa and a residence permit
In short: visas are for tourists, while residence permits have a specific purpose such as working or studying. Visas also tend to be short-term, while residence permits are typically for a year or longer.
Confusingly, the Working Holiday Visa is actually a residence permit. On the Berlin.de website, it’s described as the “Residence permit for the purpose of attending the Working-Holiday- and Youth Mobility-Programme”. Many call it the “Working Holiday Visa” (or the "Youth Mobility Visa" for Canadians) because it’s simpler, even though it’s technically not correct.
This name has become so common that it doesn't make sense to use anything else — so we will be using the term "Working Holiday Visa" for this guide as well.
Working Holiday Visa requirements
The Working Holiday Visa requirements can be slightly different depending on where you are applying from. More on this below.
To be eligible for the Working Holiday Visa, you need to:
- Be between 18 and 30 years of age inclusive (up to 35 if Canadian).
- Be a citizen from one of the countries listed above.
- Not be accompanied by dependent family members (e.g. children).
- Have the equivalent of at least 2000 Euros in savings.
- Provide one current biometric photo (35mm x 45mm)
- Have travel insurance that is valid for at least one year.
- Have a valid passport.
If you are applying from within Germany, you need to:
- Complete the form: Antrag auf Erteilung eines Aufenthaltstitels.
- Provide your original Anmeldung certificate (replace this with actual name).
We’ll go through the details in the following sections.
Application process by nationality
The application process for the Working Holiday Visa is straightforward, but it’s easy to get confused since each official source seems to be missing some information. We’ve done our best to combine all the information in one place.
Citizens of Australia, Israel, Japan, and New Zealand
Visa applicants from Australia, Israel, Japan, and New Zealand are eligible to apply for the Working Holiday Visa with the age limit of 18-30 years old (until your 31st birthday).
You have the most options and can apply at the following locations:
- Immigration office (Ausländerbehörde) in Berlin, Germany
- German embassy or consulate in your home country (Sydney, Tel Aviv, Tokyo, Wellington)
- German embassy or consulate abroad
These nationalities can receive a 90-day Schengen visa waiver on arrival in Germany. This is free. You then have 90 days to organize your documents and complete the Working Holiday Visa application process at the Ausländerbehörde in Berlin.
Citizens of Canada
Visa applicants from Canada are eligible to apply for the Working Holiday Visa (also called the Youth Mobility Visa) with the age limit of 18-35 years old (until your 36th birthday). This means you have five more years compared to everybody else.
You have the same options as Australia, Israel, Japan, and New Zealand:
- Immigration office (Ausländerbehörde) in Berlin, Germany
- German consulate in Toronto
- German embassy or consulate abroad
Canadians are also able to receive a 90-day Schengen visa waiver on arrival.
Citizens of Argentina, Chile, and Uruguay
Visa applicants from Argentina, Chile, and Uruguay are eligible to apply for the Working Holiday Visa with the age limit of 18-30 years old (until your 31st birthday).
You will have to make your visa application at a German consulate or embassy at one of these locations:
- Argentina: German embassy Buenos Aires
- Chile: German embassy in Santiago
- Uruguay: German embassy in Montevideo
Citizens of Argentina, Chile, and Uruguay are also able to apply at any German consulate or embassy abroad. In either case, this will need to be organized before your arrival in Germany.
Citizens of Brazil, Hong Kong, South Korea, and Taiwan
Visa applicants from Brazil, Hong Kong, South Korea, and Taiwan are eligible to apply for the Working Holiday Visa with the age limit of 18-30 years old (until your 31st birthday).
You will have to make your visa application at a German consulate or embassy at one of these locations:
- Brazil: any German consulate in Brazil
- Hong Kong: German embassy in Hong Kong
- South Korea: German embassy in Seoul
- Taiwan: German embassy in Taipei
This will need to be organized before your arrival in Germany.
Working durations and restrictions
The Working Holiday Visa has some restrictions which are dependent on your nationality. However, there are some exceptions. There also seem to be inconsistent results for the same passports receiving different condition, so the following is a guide only.
Citizens of Australia, Canada, Japan, and New Zealand
Citizens of Australia, Canada, Japan, and New Zealand can work with the same employer for up to one year.
Note: Although this is not specified on many official sources, it appears that applications from outside of Germany are limited to six months instead of one year. People who apply from within Germany do not have employer limitations. However, this is inconsistent and doesn't always seem to be the case.
Full-time and part-time work are both allowed. Self-employment and freelance work is not permitted.
Citizens of Argentina, Brazil, and South Korea
Citizens of Argentina, Brazil, and South Korea can only work for a total of six months. Self-employment and freelance work is not permitted for Argentinians, but is unconfirmed for Brazilians and South Koreans.
Citizens of Chile and Uruguay
Citizens of Chile and Uruguay can work with the same employer for up to six months. Self-employment and freelance work is allowed.
Citizens of Hong Kong, Israel, and Taiwan
Citizens of Hong Kong, Israel, and Taiwan can only work with each employer for up to three months. Self-employment and freelance work is allowed for Israelis, but this is unconfirmed for nationals from Hong Kong and Taiwan.
Application process in Germany
The following Working Holiday Visa application process in Germany is only possible for nationals from Australia, Canada, Israel, Japan, and New Zealand. For the purposes of this guide, we will assume that your application will be taking place at the Ausländerbehörde in Berlin.
To make sure you have as much time as possible to prepare your documents:
1. Book your flight to Germany
Check that your passport still allows you to enter Germany on the 90-day Schengen visa-free waiver. There have been some changes over the years, and there are rumors about more changes in 2022 and 2023. If you’re not eligible, you’ll have to organize a Schengen visa or similar.
2. Book your appointments in advance
It can be difficult to find an appointment to register your address (Anmeldung) at the Bürgeramt. Finding a visa appointment at the Ausländerbehörde can be even harder. Everybody is trying, so they book out very quickly. To avoid stress, it’s recommended that you try to organize these before you even arrive in Germany.
Try to book your Working Holiday Visa appointment as close to your 90 days as possible to give yourself more time to organize your documents. Then, book your Anmeldung on just before your visa appointment, as you’ll need this as part of your visa application.
It’s likely that you’ll find that all of the time slots are unavailable. Unfortunately, this is normal — and it’s why you should try to book your appointments well in advance. Many people start panicking after realizing they’re running out of time, and you can improve your chances by simply thinking ahead.
New appointments become available around 7am, so this is the best time to check. It’s also a good idea to continue checking throughout the day to find canceled appointments. To make this easier, save the links on your phone.
3. Open a German bank account
If you don’t have one already, you’ll need to open a bank account that allows you to send, receive, and pay in Euros.
Most banks in Germany require you to have your Anmeldebestätigung (registration certificate) to open a bank account, but it’s most likely that won’t have your Anmeldung appointment until later.
Until then, the easiest thing to do is open a Borderless account with Wise (previously called TransferWise). Wise offers the best currency exchange rates right now, and Borderless is their version of a multi-currency bank account. You also get a debit card which you can use fee-free, anywhere in the world.
We recommend keeping your Wise account for currency transfers, but you should also get a German bank account as soon as you can. Wise’s Euro account is based in Belgium, and there are some cases when you specifically need a German bank account in Germany.
N26 is a great option, since they speak English and don’t require a registration certificate. They also have a free debit card and ATM cash withdrawals.
If you already have an address in Germany, you can even set up your account beforehand and have your debit card ready in your mailbox when you arrive.
4. Find a flat (or a friend)
Proof of address is one the main requirements of the Working Holiday Visa. This is easily the hardest step, and is the reason why you should give yourself as much time as possible.
There’s a housing shortage in Berlin, and finding a flat can be really hard. If you don’t know anyone and don’t speak German, this can be even harder. The easiest way to improve your chances is to look further outside of the city, then look for a more central flat later on when you don’t have to rush. You should also ask everybody you meet for referrals.
You can find a flat online here:
- WG-Gesucht: A popular website for finding shared flats, as well as other types of housing. Most ads are by landlords and tenants, rather than agents.
- Facebook Groups: There are many housing-related groups in Berlin, such as Berlin Apartments, Flats in Berlin, Berlin Housing, and WG Zimmer Wohnung in Berlin.
- eBay-Kleinanzeigen: German classifieds, similar to Gumtree or Craigslist.
- ImmoScout24 / Immowelt.de: The two leading property sites. Most ads are by agents, rather than tenants.
It’s also worth searching for the Facebook group specific to your nationality, such as Australians in Berlin. Many flats are listed in these groups before being released to the public.
Hotels, Airbnbs, and short-term rentals will not allow you to register there, even temporarily.
There are also plenty of sublets that are available on the rental market, all of which are listed as “no Anmeldung possible”. Most of these are illegal sublets, and both you and the tenant will get into trouble with the landlord if found out.
One workaround is to register at a friend’s apartment, but only with the permission of the landlord. This is not always possible, but it’s worth asking. They will likely ask you to find a permanent flat and deregister from that address as soon as possible.
For the purposes of the Working Holiday Visa, you will need to have an Anmeldebestätigung (registration certificate), or your original lease contract and the Wohnungsgeberbestätigung (proof from your landlord).
5. Register your address
Check your emails for the address of the Bürgeramt and your customer number. Don’t be late, as appointments start on time. The Anmeldung process itself is simple, takes about ten minutes, and is free.
You’ll need to bring your:
- Passport
- Anmeldeformular (registration form)
- Wohnungsgeberbestätigung (landlord confirmation)
The Wohnungsgeberbestätigung can also be filled out by the main renter with the permission of the landlord. The main renter is the person who is on the rental contract and is responsible for the flat.
If you haven’t managed to book an appointment, some Bürgeramts around the city accept walk-ins, although it’s not a good idea to rely on this.
Once you've successfully registered, you will receive your Anmeldebestätigung (registration certificate).
6. Get health insurance
Health insurance is a requirement for anyone living in Germany. Travel insurers such as Mawista and Care Concept were a cheap and popular option for Working Holiday Visa applicants, but these have been getting rejected lately. World Nomads still seems to work, although you will need to buy a full year in advance for this to be accepted.
Otherwise, we recommend Feather Insurance for "proper" German health insurance for expats. They provide a guarantee to be accepted for visa applications, and their insurance policy is tailored to expats, which offers better value than other health insurance options in Germany. You can also pay monthly, rather than a full year upfront.
If you get a job, you will need to join the German health care system — travel insurance is not enough. This means that applying for your Working Holiday Visa with travel insurance means you will end up paying for both. In short, World Nomads is better if you don't intend to work with your Working Holiday Visa, while Feather is a better option if you do intend to work.
More information about this below.
7. Prepare your documents
By this point, you will have most of your documents ready. The full list is below.
8. Go to your visa appointment
There are two Ausländerbehörde locations in Berlin. The one responsible for is at Friedrich-Krause-Ufer 24, near the Charité Hospital.
COVID-19: Due to the global pandemic, you cannot bring a friend or translator into the appointment. If needed, an alternative is to have somebody ready on the phone to speak with your case worker. However, the case workers at the Ausländerbehörde have become much friendlier and are now encouraged to speak English with applicants. This was not the case a few years ago, so this is a huge improvement.
While not as punctual as the Bürgeramt, you should arrive for your visa appointment as early as possible. If you miss this appointment, it may be difficult to get a new one.
Visa applicants used to get their Working Holiday Visa on the spot. This is no longer the case. Instead, you'll be provided with a confirmation letter and your residency card will be sent directly to your registered address (see: Anmeldung) in about a month's time.
If you are unsuccessful, your case worker will tell you what to do next. If it's a matter of missing documents, they may give you a temporary time extension. This gives you the opportunity to organize the missing documents and come back at a later date.
Application process from abroad
Whether you're applying from your home country or somewhere else in the world, the requirements are often different to a Working Holiday Visa application in Germany.
For the most relevant and up-to-date information, I'd recommend having a look through this list of German consulate and embassy websites — the most up-to-date information and contact details should be available there. If you're unsure about anything, simply send through an email or call. They're usually very receptive and respond within a few days.
One key difference appears to be that applications from abroad require a CV and an accompanying letter that explains why you would like to be a part of the Working Holiday Visa program.
Required documents
Whether you're apply in Germany or abroad, the list of required documents is quite similar. In both cases, you will need to bring a physical and original copy of all of the following documents:
A valid passport
Your passport should be valid for at least another 6 months and have at least two free pages remaining.
A biometric photo
The dimensions are 35x45mm. There is a Fotoautomat at the Ausländerberhörde, but you should prepare this in advance. I had my passport photo taken at one of the many Fotofix booths around Berlin.
Proof of insurance
For your application, you must have insurance. For the Working Holiday Visa application, you have two options: travel insurance, or health insurance.
Travel insurance covers you for your time in Germany, as well as your future travels. You will need to pay for a year upfront and your policy will be managed by the travel insurance company. If you travel quite a lot and don't really intend to work, this may be a better deal. For this, we recommend World Nomads.
"Proper" German health insurance covers you for your time in Germany, and travel insurance is typically not included. However, you can often add it as an extra. You can pay your health insurance monthly, and this should be cheaper than a yearly travel insurance policy. You are also insured by a German insurer, rather than a global company. If you intend to work, you will have to move to the public health insurance system. For this, we recommend Feather Insurance — they can help you with both.
Proof of funds
Bank statements for at least 2,000 Euros. If the bank statement is in another currency, use a tool such as XE.com and write the converted total in Euros on your statement.
Proof of residence
Ideally, this would be your Anmeldebestätigung, but you can also bring a Wohnungsgeberbestätigung and written confirmation from your landlord. The second option is only possible if the rental agreement is under your name.
Application form
The application form for the Working Holiday Visa is called Antrag auf Erteilung eines Aufenthaltstitels, which translates to "Application for Issuance of a Residence Permit". You will need to complete this and provide it to the case worker at your appointment.
Payment
The Working Holiday Visa application costs between 56€ and 100€. To make thing easier, I would suggest bringing cash. Otherwise, the Ausländerbehörde a specific type of debit card which you're unlikely to have. Mastercard and Visa are not accepted
FAQ (12)
I first published this guide in 2017, which resulted in hundreds of comments, where I ended up researching each person's situation. After realizing that I was essentially providing immigration advice for free, I decided that this was unsustainable and shut down the comments on this website.
This guide has gone through a major update in 2021, condensing information and perspectives from hundreds of people into one straightforward resource. All of the main questions from the comments have been summarized into this FAQ section.
How do I get a Working Holiday Visa for Germany?
To apply for the Working Holiday Visa for Germany, you need to provide your passport, a biometric photo, proof of insurance, bank statements for at least 2000€, proof of residence, and a completed application form called Antrag auf Erteilung eines Aufenthaltstitels.
How much is the Working Holiday Visa?
The Working Holiday Visa costs between 56€ and 100€. This depends on the difficulty of your application and is hard to predict.
How long is the Working Holiday Visa for?
The Working Holiday Visa is for one year. The conditions for how long you can work with each employer is specific to each nationality.
How long does it take to get a Working Holiday Visa?
The Working Holiday Visa appointment takes about 20 minutes, but receiving your residence permit takes about a month. It used to be on the spot, but the Ausländerbehörde now sends a physical card to your registered address.
Do I need a proof of address when applying from outside of Germany?
No. This is a requirement specific for those applying in Germany.
What happens if I can't get my Anmeldung in time?
The easiest thing to do is to apply from outside of Germany (e.g. the Netherlands). Alternatively, you can leave the Schengen Zone and try again when your 90-day visa-free period has reset. You might get lucky by contacting the Ausländerbehörde for an extension, but the rules are quite clear.
How far in advance can I apply for a Working Holiday Visa?
You can specify the starting date, however there is a general rule that you can apply for up to 90 days before your intended arrival date.
Do I need to speak German to get a Working Holiday Visa?
No. Many people arrive in Germany with barely any German. Many learn German, however it is also easy to get by in cities such as Berlin.
Can I freelance on a Working Holiday Visa in Germany?
This depends on your nationality and where you applied from. If your intention is to freelance, you may want to consider the German Freelance Visa.
Can I travel around Europe with my Working Holiday Visa?
Yes. You can enter and leave Germany an unlimited number of times on the Working Holiday Visa, with 90 days visa-free in the Schengen Zone for every 180 days. If you are traveling outside of the Schengen Zone, you will need to refer to that country's laws.
With the Working Holiday Visa, do I also need a residence permit?
No. The Working Holiday Visa is technically a "Residence permit for the purpose of attending the Working-Holiday- and Youth Mobility-Programme". The term "Working Holiday Visa" is technically incorrect — it's a type of residence permit.
What should I do if I have more questions?
There are many active Facebook groups in Berlin, and I find Berlin4Beginners, Problems and Challenges with the Ausländerbehorde, and Free Advice Berlin to be quite useful. I would suggest asking there. If you found it useful, I would also really appreciate if you linked to this guide!
What is N26?
N26 is the mobile bank that lets you manage your bank account, spend and set money aside in real-time, 100% mobile. Open yours in minutes right from your smartphone, and start spending before your physical card arrives.
N26 Pricing
All accounts feature:
- NFC contactless payments and mobile banking
- Free payments worldwide, in any currency
- In-app spending statistics and insights
- 24/7 chatbot support and in-app livechat
- Deposit protection €100,000
- 3D Secure and two-factor authentication
In addition:
N26 Standard | N26 Smart | N26 You | N26 Metal |
|---|---|---|---|
| €0.00/month | €4.90/month | €9.90/month | €16.90/month |
| Transparent debit card | Colorful debit card | Colorful debit card | 18-gram metal card |
| Up to 3 free withdrawals | Up to 5 free withdrawals | Up to 5 free withdrawals | Up to 8 free withdrawals |
| Up to 2 Spaces sub-accounts | Up to 10 Spaces sub-accounts | Up to 10 Spaces sub-accounts | Up to 10 Spaces sub-accounts |
| - | Phone support | Phone support | Dedicated Metal phone support |
| - | Optional extra card | Optional extra card | Optional extra card |
| - | Premium partner offers | Premium partner offers | Premium partner offers |
| - | - | Free withdrawals in foreign currencies | Free withdrawals in foreign currencies |
| - | - | Travel & lifestyle insurance* | Travel & lifestyle insurance* |
| - | - | - | Car rental insurance |
| - | - | - | Phone insurance |
| - | - | - | Curated, unique experiences |
| Learn more | Learn more | Learn more | Learn more |
*See their full list of coverage options
There are a few things that I wanted to do differently compared to other N26 reviews.
From a personal perspective: I got obsessed with "points hacking" a few years ago, and since then, I've developed an interest in the banking industry for many years. I've gone on to open and close over a dozen bank accounts - just to try them out - and have churned through about the same amount in credit and debit cards.
From a professional perspective: I've worked as a strategy consultant in the banking and finance industry - so it'd be fair to say that my knowledge of banking is a little above average. I've since transitioned to UX (User Experience), so I'm now on the other side of the table when it comes to banking.
I'm also a non-European expat in Berlin, which means that I've had to jump through more hurdles than most people you meet in Europe. After writing long WhatsApp messages to friends about these topics, I've turned some of these into articles such as How to Apply for a German Working Holiday Visa and How to Apply for a German Freelance Visa, as well as more general guides such as Buying a SIM Card in Germany.
Rather than just using what I'm used to (as many locals might do), I've been on the lookout for what would best suit myself, my friends, and my readers. Basically, I’ve spent a lot of time doing my homework.
And now, onto my N26 review.
N26 Features
N26 was founded in 2013 and was originally called Number 26, rebranding around the same time that they received their banking license from BaFin in 2016.
Its headquarters are in Berlin, however they serve most of Europe. This includes: Austria, Belgium, Denmark, Estonia, Finland, France, Germany, Greece, Iceland, Ireland, Italy, Liechtenstein, Luxembourg, the Netherlands, Norway, Poland, Portugal, Slovakia, Slovenia, Spain, Sweden, Switzerland. They've since expanded to the US, while pausing activity in the UK due to the uncertainty around Brexit.
From an industry perspective, Germany has been historically conservative when it comes to anything to do with money, largely thanks to a public preference for cash. This resulted in a collection of extremely traditional banks that have been complacent and have struggled to play catch up with digitisation.
This is when the relatively young N26 swooped in to take customers from the traditional banks, offering modern banking, an excellent app (seriously, it's world-class), integrated foreign currency conversion, and in mid-2016 - their own banking license from the official German regulator BaFin. This sets them ahead of most of the competing digital banks, and also means that they were completely unaffected by the Wirecard scandal in June 2020.
Now, N26 is by far the best choice for people who want a modern banking solution.
And if you'd prefer to do your banking in English, you're in luck: N26 is the only bank in Germany that officially supports English as well as German. The app also works in English, German, French, Italian and Spanish.
Learn more about N26 here (opens in new tab).
N26 Security
N26 comes in three types of accounts: Standard, You and Metal.
Update (July 2020): The N26 website has recently been refreshed and the "Plans" section does a great job at explaining the different types of accounts. I'd highly recommend starting there.
The most obvious difference between the different N26 bank accounts are the cards.
The N26 Standard card looks like this:
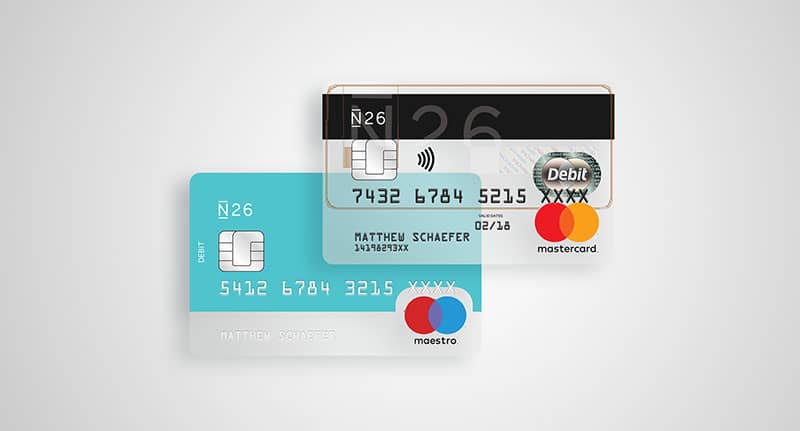
The N26 You card comes in multiple colour options:
And the N26 Metal card comes in a beautiful 18-gram metal finish:
All three plans share the following features:
| N26 Standard | N26 You | N26 Metal |
| Transparent debit card | Colourful debit card | 18-gram metal card |
| Contactless payments | Contactless payments | Contactless payments |
| Mobile payments | Mobile payments | Mobile payments |
| 100% mobile banking | 100% mobile banking | 100% mobile banking |
| Free payments worldwide | Free payments worldwide | Free payments worldwide |
| 3 free withdrawals* | 5 free withdrawals* | 8 free withdrawals* |
| Deposit protection^ | Deposit protection^ | Deposit protection^ |
| 3D Secure protection | 3D Secure protection | 3D Secure protection |
| Two-factor authentication | Two-factor authentication | Two-factor authentication |
| 24/7 chatbot support | 24/7 chatbot support | 24/7 chatbot support |
| In-app live chat | In-app live chat | In-app live chat |
* in the Eurozone. With foreign currencies, You and Metal cardholders have unlimited free withdrawals in other currencies, anywhere in the world.
^ up to 100,000€ by the German Deposit Protection Scheme.
However, the N26 You and N26 Metal plans also have a number of extra premium features.
N26 Support
N26 has two premium plans called "You" and "Metal".
N26 You is 9.90€ per month, while N26 Metal is 16.90€ per month. While typically I don't recommend paid bank accounts (especially when the Standard account is already so good), N26 You and N26 Metal actually offer great value for money - especially if you're a frequent traveller.
Here's an overview of travel benefits:
| N26 Standard | N26 You | N26 Metal |
| - | Medical travel insurance | Medical travel insurance |
| - | Trip insurance | Trip insurance |
| - | Flight insurance | Flight insurance |
| - | Luggage coverage | Luggage coverage |
| - | Mobility insurance | Mobility insurance |
| - | Winter sport insurance | Winter sport insurance |
| - | - | Car rental insurance |
| - | - | Phone insurance |
Then, there are the premium perks:
| N26 Standard | N26 You | N26 Metal |
| Up to 2 sub-accounts | Up to 10 sub-accounts | Up to 10 sub-accounts |
| - | Shared sub-accounts | Shared sub-accounts |
| - | Partner offers | Partner offers |
| - | - | Tailored experiences |
| - | - | Dedicated support line |
While most banks have a fancy card for their premium plans (N26 has these too), the N26 You and N26 Metal plans actually offer really good value - especially if you travel a lot.
See a more detailed breakdown of N26's plans here.
N26 Alternatives
If you don't speak German - no contest, N26 is the best bank in Germany.
If you're an expat, globally-minded resident, frequent traveller - still yes, absolutely.
If you're not interested in these things, but want modern banking features, transparency, and overall customer experience - in my opinion, N26 still comes out on top. N26's progress seems to have jump-started a game of catch up in the banking industry, but they're still way ahead.
There are a lot of things that set N26 ahead of the rest, but here are the points that most people care about.
✅ Free Cash Withdrawals From Any ATM
With N26, you get 3 monthly cash withdrawals every month as standard. "You" and "Metal" cardholders get even more.
While other banks such as Sparkasse can only withdraw cash from their own ATMs, N26 allows you to use these free monthly cash withdrawals from literally any ATM across the country. Other banks would charge you around 5€ to use other bank's ATMs. In one of their past announcements, N26 explained that they absorb the cost of ATM withdrawals on behalf of their customers.
If you're really in a pinch, you can use the CASH26 feature on your app to create a barcode, have it scanned at one of 11,150 retail partners across Germany (including REWE, Rossmann, DM and Penny) and get up to 900€ over the counter every 24 hours, as many times as you want.
Here's how it works:
[embedyt] https://www.youtube.com/watch?v=csuw7s0j8qk[/embedyt]
Not bad for a bank account that's completely free.
✅ No Monthly Account Fees
In other words, free.
By comparison, banks such as Sparkasse and Deutsche Bank have monthly fees of 3-6€ per month, while other banks such as Commerzbank and DKB have minimum account balances and other complicated fine print.
✅ Free Maestro & MasterCard Debit Cards
N26 provides a MasterCard debit card as standard, and you can request a Maestro card if you'd like one.
I've got both, but have found little use for the Maestro card, but it's nice that they offer both options as some of the less digitally-inclined businesses around Germany sometimes have issues with MasterCard and Visa cards.
Don't ask why - it doesn't make sense to me either.
✅ No International & Foreign Currency Exchange Fees
Simple enough: there are no fees for using your card abroad, or for purchasing something in another country.
There are also no foreign currency exchange fees. This is quite unusual for a free card, but comes as a blessing for frequent travellers that want to spend their Euros outside of the Eurozone.
Currency exchange rates are also set by MasterCard, which is one of the best ways of getting a fair exchange rate on foreign currency.
✅ Great Customer Support in 5 Languages
One of the biggest struggles that people encounter when arriving in a new country is the language barrier.
While some banks have branch managers who might be willing to help out, English is not an officially supported language in most German banks. This also means the contracts and documentation will be exclusively in German, with the occasional half-hearted translation.
I've rarely needed to contact customer support, as everything just works.
However, on the few occasions that I've had some questions, I went straight to their live chat and was connected within minutes. Customer support was super quick to respond and even helped me figure out some mystery fees that had turned up on my card (turns out they were some sneaky fees from PayPal).
Customer support is available in English, German, French, Italian and Spanish.
✅ Overall Great User Experience and Transparency
You might not think that this is so important, but hear me out.
I've found that Germany (and Germans, by default) are very straightforward people - it's one of my favourite traits. That said, I've also noticed that people expect the same of their companies, and they often exploit this trust by disguising it with complexity. Add the fact that many companies have not bothered digitising for the 21st century, and you find a lot of fine print.
N26 prioritises user experience, and this has resulted in a service that's refreshingly transparent.
Even their legal documents make sense to the average person, and are even translated into two languages (English and German).
See the N26 website to see for yourself.
✅ Excellent Value Free & Premium Plans
While most people would be fine with the free plan, they also have the N26 You (9.90€ per month) and N26 Metal (16.90€ per month) premium plans. Read more about these above.
✅ Open an N26 Account Without Anmeldung
Most banks require proof of address (Anmeldung), but this can be hard to obtain for people who have just arrived in the country. N26 understands this - and the fact that a large part of their customer base are expats - which means that an Anmeldung is not necessary for most applications. Still, some exceptions apply.
Check out the N26 website to find the latest information.
✅ Create a Free N26 Account in Less Than 10 Minutes
If all goes well, opening an N26 account takes less than 10 minutes and can be done from anywhere in the world.
Simply open the app, start a video chat, take photos of your documents (e.g. passport), complete your video verification, and you're done. You'll receive get your debit card in the mail a few days later.
Get started with your free N26 account.
✅ A Feature-Packed, World-Class Banking App
N26's app is both simple and functional, with a few useful tricks hidden up its sleeve.
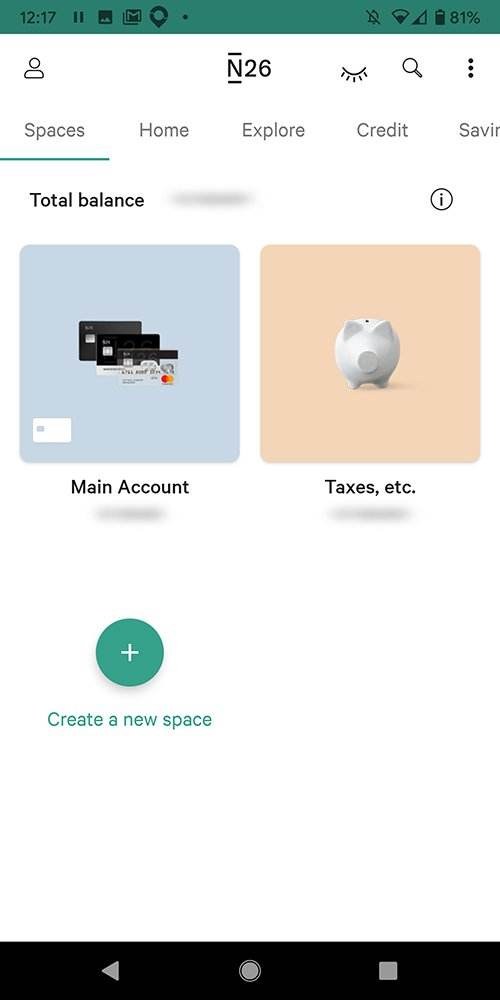
Overall, it looks and works great - clean, intuitive and easy to use.
They've done a great job with the details, such as the subtle animations on the login screen, a native dark mode, and the ability to hide your balances by waving a hand over the screen. Each transaction is automatically categorised, which can then been viewed as statistics of your spending habits.
Then, there's the handy Spaces feature to put aside money for later (such as taxes, future holidays, and so on), and N26's Moneybeam allows you to transfer funds to anyone on your contact list using their phone number.
Here's how Spaces work:
[embedyt] https://www.youtube.com/watch?v=rejvsITkYQI[/embedyt]
More recently, they've added shared Spaces. For example, you can have a shared space for groceries with your housemates, or even a shared Space with your spouse.
Above all, one of my favourite features are the instant push notifications that I receive whenever a transaction has been made from my N26 account. This gives me complete visibility over my account and peace of mind. Logging into the web version of N26 also requires two-step verification from the N26 app, which now supports fingerprints.
N26 also has a TransferWise integration, which allows you to convert and send your money in different currencies at far cheaper rates than what you'll find at banks of foreign exchanges.
I've used dozens of banking apps, and N26 has really nailed the functionality and experience - only including features that are actually useful on a daily basis, and leaving out all the fluff.
N26 FAQ
After being seeing the same questions being asked over and over again, I've added some answers to this N26 review.
What Bank is Behind N26?
There isn't one. N26 is what's called a "neobank", a type of direct bank that operates completely online and doesn't have any physical branches. Before obtaining their banking license from BaFin in 2016, N26 was called Number 26 and their back-end built on Wirecard.
Was N26 Affected By the Wirecard Scandal?
No, they were not. Since N26 moved away from Wirecard in 2016, it was not affected by the Wirecard scandal in June 2020 that locked down other digital banks. N26 has had its own banking license from BaFin since 2016.
Is N26 a 'Real' Bank?
Yes, N26 is a fully licensed bank. They're licensed with BaFin, the financial regulatory authority for Germany, which insures all deposits up to 100,000€ held in the member states of the European Union.
They've even made a video about their banking license and how it benefits their customers:
[embedyt] https://www.youtube.com/watch?v=rQJwd0RqBXA[/embedyt]
This is important, because many of the English-speaking bank alternatives that people often mention are... well, not real banks. If you open an account with one of these companies, you have no protection if they go bankrupt or something goes wrong, such as the recent Wirecard scandal occurs.
With N26, this isn't an issue and you're protected against all of this.
Is N26 Secure?
Yes, see above. N26 is as safe as you'll find with any other bank in Germany.
Is N26 a Reliable Bank?
Yes, N26 is about as reliable as any other bank in Germany. They're a fully licensed bank with BaFin, which also means that your money is guaranteed up to 100,000€ by the German Deposit Protection Scheme.
How Do I Put Money Into My N26 Bank Account?
To transfer foreign currency into your N26 account, I highly recommend using TransferWise. TransferWise is by far the cheapest and safest way to transfer foreign currency to any bank account of your choice. Simply head to the TransferWise website and open a free account to get started.
If you're transferring Euros, it works the same as any other European bank account - simply add in your banking details (e.g. name and IBAN) and the amount you want to send.
Can I Receive My Salary in N26?
Yes, absolutely. When receiving your salary, you'll receive a push notification from the N26 app and it will be automatically characterised as "Salary".
Is N26 Really Free?
Yes, the Standard account is completely free. This is the account that most people end up using, although the premium plans (You and Metal) do offer exceptionally good value.
Does N26 Do Overdraft?
Yes, you can activate overdraft from within your N26 app.
All it takes is a quick credit check, and they'll let you know how much you'll be able to overdraw. Then, you can customise the amount as you like it through the app.
Can N26 Be Used Abroad?
Yes, N26 is one of the best cards available for travel. Zero international and currency conversion fees come as standard, and the premium plans offer comprehensive travel, medical and liability insurance for while you're on the move. Their top Metal plan even includes smartphone insurance.
So, Is N26 Any Good?
In short: yes.
If you're looking for a modern banking experience within Germany (or Europe, for that matter), N26 is a great choice.
If you're looking for an English-speaking bank, N26 is your only choice. Luckily for you, it's a great one.
N26 is also especially good for travellers, as it includes a number of premium features (such as zero international fees and currency conversion fees) as standard, while their "You" and "Metal" premium plans offer travel, medical and liability insurance for almost any situation you can think of.
But don't just take my word for it - go to the N26 website to see for yourself, or check out my other article on how to open a bank account in Germany for step-by-step instructions. If you need Euros, I also highly recommend using TransferWise to convert and send your home currency to your new N26 account. It's significantly cheaper than any bank or currency exchange, and I use it myself to convert Australian Dollars to Euros, and vice versa.
Thanks for reading!
In this article, I've put together a list of websites that offer open-source, completely royalty-free vector illustrations that you can use for your next project - for both personal and commercial use.
Many of them are in SVG format (i.e. a vector image) and quite a few of them also have a "generator" or "builder" function that allows you to add your brand's colours. Some can combine multiple visuals into one that's completely unique for your project, while a few even allow you to export their designs to Sketch, Figma, Adobe XD and InVision.
What is a Vector Image?
In a nutshell, a vector image is a type of computer graphic image that can scale (grow and shrink) in size without any loss of image quality. This is achieved by using lines and curves to create images, as opposed to the more common raster graphics file formats such as JPG and PNG.
Common vector images file formats include SVG, EPS, PDF and AI. For web use, SVG is probably the most common file format.
Which is Better: SVG or PNG?
While PNGs are a versatile file format, they quickly become very large as the image becomes more complicated or needs to be visually larger. SVGs on the other hand, can grow and shrink without any change in file size, making it a far leaner way to add visuals without adding bulk.
Most of the vector illustrations and images below are available in SVG format, which makes it easy to add them to your next project. They're also open source, copyright-free and royalty-free.
What are Open-Source Images?
The concept of "open source" originates from software development, which is a type of computer software where the source code is free to be used, studied, modified and distributed by anyone, for anyone, for any purpose.
Open-source images are similar, in the sense that they can be used by anybody for any purpose - be it for a personal project or commercial use. They can also be edited, modified and combined with other images to create new designs.
What are Copyright-Free Images?
Copyright-free images are images that have been authorised by the creator to be used by others. The difference between copyright-free images and open-source images is that open-source images can be redistributed, modified and sold. Copyright-free images are usually not allowed to be resold, and in some cases, the original creator retains copyright (although permission has been given for them to be used elsewhere).
What are Royalty-Free Images?
Royalty-free images are typically a type of licensed stock image which has been purchased for a once-off fee. This license allows the purchasers to use the image in a pre-determined number of ways for a flat fee - that is, no commissions need to be paid on to the image's creator if the project is commercially successful and makes money.
What is Creative Commons and How Does It Work?
Creative Commons (CC) is a non-profit international organisation that provides free licences for creators to protect their work. This is usually for creative projects and assets that are available to the public, and often requires the end user to "give credit" (i.e. attribution) back to the creator. These licences help creators to define how their creative work can be used by others in the public domain.
There are 7 main types of licenses, most of which require attribution. Wikipedia has a helpful table to explain this.
All (or most) of the free vector illustrations below have the "CC0" license, also known as "public domain" which allows anybody to use the creative work without attribution, and for both personal and commercial purposes.
Customisable Vector Illustration Generators
Hot tip: many of the free vector illustrations below include a "generator", which allows you to modify the base colours to match your branding. Be sure to look around the website to find this option!
List of Where to Get Free Vector Illustrations
Here are 41 websites to get free vector illustrations:
- undraw.co
- humaaans.com
- opendoodles.com
- openpeeps.com
- iradesign.io
- scribbbles.design
- icons8.com
- iconscout.com
- manypixels.co
- woobro.design
- fresh-folk.com
- isometriclove.com
- lukaszadam.com
- illlustrations.co
- isometric.online
- drawkit.io
- absurd.design
- usesmash.com
- avataaars.com
- bottts.com
- growwwkit.com
- abstrakt.design
- kapwing.com
- error404.fun
- lab.streamlineicons.com
- control.rocks
- blackillustrations.com
- deliciousdesign.store
- itg.digital
- getillustrations.com
- blush.design
- holla.today
- products.ls.graphics
- sleekbundle.com
- karthiksrinivas.in
- geeme.now.sh
- delesign.com
- freellustrations.com
- freevector.com
- selfspace.design
- storytale.io
A few of these overlap in style, but I thought it would be helpful to include all of the vector illustration options available. Pick and choose the ones that you think suit your project best!
On a related note: if you're looking for a more comprehensive resource for design assets, check out Envato Elements - probably the most comprehensive and best value design resource around at the moment.
Have I missed any free vector illustration websites?
Leave a comment and I might add it to the list. Happy designing!
Cycling in Amsterdam is as natural as eating, sleeping or breathing. This makes the humble bicycle an essential tool used every day by everyone to get where they need to go.
Still, the process of buying a bicycle can be a minefield for the uninitiated. If you don't have the right information, you might end up buying a piece of junk, or worse, needlessly spend endless amounts of money on repairs. I've been there.
This is especially the case for expats who are new to the city, so to make things easier, I've put together a comprehensive expat's guide for buying a bicycle in Amsterdam.
First: Crash Course of Dutch Words for Bicycles
A lot of the resources I mention below are exclusively in Dutch, so it's good to get a grasp of the most common terms first.
Types of bicycles:
- Fiets/en - Bicycle/s
- Stadsfiets/en - City bike/s
- Elektrische fiets/en - Electric bike/s
- Racefiets/en - Racing bike/s
- Mountainbikes - Mountain bike/s
- Transportfiets/en - Transporter bike/s
- Abonnementsfiets/en - Subscription bike/s
Gender/age-specific:
- Herenfiets/en - Men's bike/s
- Damesfiets/en - Ladies bike/s
- Omafiets/en - Grandma bike/s
- Opafiets/en - Grandpa bike/s
- Kinderfiets/en - Children's bike/s
Dutch is similar enough to English that you'd have a good chance at figuring out what means what, but if all else fails, Google Translate / DeepL is your friend!
How to Buy a Bicycle in Amsterdam
In Amsterdam, there are a lot of ways to buy a bicycle: Facebook groups, local markets, flea markets, supermarket notice boards, Marktplaats, and to some extent, Craigslist. You can also find brick and mortar shops all around Amsterdam that stock both new and second-hand bicycles.
Then, there are online retailers such as Bol.com who have recently started offering brand new bikes at second-hand prices (and the quality seems pretty good as well!), which is a gamechanger for first-time bike buyers. My best value pick would be the Progress Bike Stadsfiets 28 Inch (50/56cm variants) which costs 159€. You can also pick up a bike lock or two at the same time (I prefer and recommend Abus locks).
Unless you're being really picky, it shouldn't take you more than a couple of days to find yourself a bicycle.
My first bicycle took me less than three hours from first contact (through Facebook groups) to handing over my hard-earned Euros. It turned out to be a huge headache and I had to buy a new one in the end - but hopefully, this article will help you make more educated decisions than I was making when I first arrived in Amsterdam.
Facebook Groups
Facebook groups are one of the best ways to buy a bicycle in Amsterdam. The two main groups I've used are Bike Marketplace - Amsterdam and Second Hand Bikes, but I've also had some luck with the general "buy and sell" groups such as Buy & Sell Amsterdam. As you can imagine, these are typically second-hand bikes.
It's also worth checking out Amsterdam Second Hand Marketplace and Expat Republic Amsterdam.
Marktplaats
If you want to "go local", Marktplaats is the local equivalent of Craigslist or Gumtree. You'll want to search for keywords "fietsen" or "fiets, which is "bicycle" in Dutch. The typical bicycles you'll see around Amsterdam are called "omafiets", which roughly translates into "grandma's bicycle" - cheap, comfortable, and almost indestructible.
Local Markets
If you want to buy your bicycle from a local market, your best bet is the Waterlooplein Market (open Monday to Friday between 9am and 5:30pm, and Saturdays between 8:30am and 5:30pm) near the centre of Amsterdam. As soon as you arrive, you'll see a number of second-hand bicycles that are lined up for sale.
Then, there's also the Albert Cuyp Market (open Monday to Saturday, 9am to 5pm) which is well worth a visit anyway, as it's Amsterdam's largest market with plenty to see and do.
Flea Markets
Amsterdam loves its second-hand flea markets, and these can also be a great option for finding a great bicycle for cheap. If you can time it right, the best market to go to is the monthly IJ-Hallen Market that's held in Amsterdam-Noord (North Amsterdam).
It's 5€ for entry, but you'll have access to a huge selection of second-hand and vintage items, from clothes, furniture, and of course, bicycles. This is the biggest market in Europe, so it's worth checking out regardless!
Supermarket Noticeboards
Many supermarkets around the Netherlands have free noticeboards for locals to advertise things for sale. Bicycles are fairly common on these noticeboards, so have a peek at the noticeboard on your next visit to Albert Heijn. You might find better bicycles here, since they tend to be locals who aren't going to sell you a dud bike and disappear from Facebook.
Craigslist
Craigslist isn't very popular in the Netherlands, but you'll still find a few bicycles for sale here - usually by expats who haven't figured out Marktplaats yet. The upside is that not a lot of people are on Craigslist, so you have less competition. It's possible snag a great deal here that you might not find otherwise.
Bicycle Shops
Bicycle shops are typically more expensive, but this is the safest way to make sure you don't get ripped off while buying a second-hand bike. They have a reputation to uphold, so the bicycle they sell you won't be a piece of junk and they should be able to address any issues you spot.
Some bicycle shops even offer 2-3 months of warranty, which is nice to have since most problems occur within the first couple of months. Expect to pay upwards of 100€ at a bicycle shop for a second-hand bike - realistically, around the 120-250 mark.
If you're buying a new bike, you'll find better prices online.
In fact, you can buy a brand new bike for less than 160€ (see next section), so at this point, it's seriously worth considering if you want to spend the extra time and effort to find a second-hand bike at this price point.
Online Stores
For everyday bikes, the online retailer Bol.com (sort of like Amazon in the Netherlands) is a surprisingly great place to pick up a quality new bike. I've spent some time looking around and have picked out the Progress Bike Stadsfiets 28 Inch (50/56cm variants) which costs 159€.
At this price point, it almost doesn't make sense going through the hassle of finding a second-hand bike, unless you're looking for something very particular. I'm personally a little annoyed that I didn't know about this option when I was looking for my first bike - it would have saved me from a lot of headaches.
As a retailer, Bol has a pretty good reputation in the Netherlands, so you're in safe hands. They also stock a huge selection of bicycle accessories, such as bike locks - so it's not a bad idea to get everything at once with one up-front purchase.
Subscription Bikes (Swapfiets)
Subscription bikes are an interesting addition to Europe's cycling scene, which has gained a lot of popularity over the last few years. In short: it takes away all the hassle and headache of searching, buying and maintaining a bike of your own.
The biggest player in all this is Swapfiets, which costs 19.50€ per month.
This fee includes:
- On-call customer service between 8am and 10pm, every day
- Bike sizing tailored to you upon pickup/delivery
- Small repairs and/or free bike swap within 48 hours, wherever you are in the city
- Same-day repairs if you bring your bike to one of their locations
- Flexibility to cancel whenever you want (pay month by month)
- Replacement bike for 60€ if your bike is stolen
Basically, Swapfiets handles delivery, repairs, theft - literally everything for a small monthly fee. Plus, you can cancel anytime.
Bonus: a one-month Swapfiets subscription also happens to be on sale on Bol.com for a discounted price of 10€ (normally 19.50€). Check it out here.
Buying Second-Hand Bikes in Amsterdam - Yay or Nay?
Second-hand bikes are a great choice in a city such as Amsterdam. For starters, second-hand bikes are cheaper and tend to look "used", which can be a theft deterrent. Many also feel more comfortable with second-hand bikes as this means that they're not worried about getting that first scratch or dent. It's already been done by the previous owner, leaves the bicycle free to be used as a functional tool, the way it's intended to be.
If it's an older bike, the previous owner might have upgraded a few things (lights, tyres, etc.) while keeping the old frame. This is great for a city beater, as it should work and function perfectly without being too desirable for potential bike thieves. We'll get to that in a second.
When buying second-hand, one thing to keep in mind is to understand why people are selling their bikes in the first place.
Good reasons (for you) include:
- They're upgrading
- It doesn't fit them (too big/small)
- Selling their boy/girlfriend's bike
- They're leaving the city
Bad reasons include:
- The bike has ongoing issues such as rust, a bent frame or wheels
- It's in poor condition and repairs are too expensive for it to be worth repairing
- The tyre tubes keep puncturing (I had this problem before) because of something stuck inside the wheel
For obvious reasons, they probably won't be upfront about the bad reasons.
If you want to avoid the hassle altogether, buying a new bicycle might be a safer bet. Although you'll be paying more, the peace of mind might be worth it. Nothing is as frustrating and annoying as a bike that continues to break down and get in the way of your everyday life.
How Much Should I Pay for a Bicycle in Amsterdam?
Everyone has an opinion on the "right price" for a bicycle in Amsterdam, ranging from 30-50€ (probably stolen) to several hundred Euros. Personally, I'd say around 100-160€ is a sweet spot where you'll get a bicycle that works perfectly but isn't so flashy that makes it an attractive bicycle for thieves. For something a little nicer, be prepared to spend upwards of 200€ Euros.
Anything below that, and you're getting a great deal. Or...
What's This About Stolen Bicycles in Amsterdam?
As of 2019, over 300 bicycles are stolen in Amsterdam every single day. About 600 of those are formally reported to the police, while many shrug and move onto their next bike.
Unless you're buying from a bicycle shop, there's always the risk that you're buying a stolen bike.
Here are some signs that you might be buying a stolen bicycle:
- The seller looks a bit shifty or nervous
- The bicycle has been painted over, usually badly and in black
- Fake or new Facebook profiles (when buying on a Facebook group)
- If it's too good to be true, guess what - it probably is
- Something "just feels wrong"
All that aside, only surefire way to know if what you're buying isn't a stolen bicycle is to check the bicycle theft register. It's in Dutch, but you should be able to get a good idea of how it works by using Google Translate.
You can also register your bike at the same website if it ever gets stolen.
This is the reason why a lot of people say that buying a "nice bike" in Amsterdam isn't a great idea. I sort of agree - but realistically, you'll probably be fine as long as you take precautions such as locking your bike away indoors or in bike storage, combined with good bicycle locks (plural!).
Buying a Bicycle Lock for Amsterdam
I always buy Abus locks - they're a bit more expensive, but this is because they're the industry standard and they tend to last forever. I prefer combination locks as it's one less key to carry around, but this comes down to personal preference (and budget).
The best combination of bike locks is a U-Lock, Folding Lock and Chain Lock. Pick two. The reason for this is that it takes longer for thieves to break through two types of locks, and this is often enough to deter them from targeting your bike in the first place.
When locking your bike, be sure to lock both wheels to your bicycle frame. This prevents people from stealing your wheels or frame and selling it for parts.
Also, try to lock your bike to a fixed object such as a bicycle rack or signpost, as this prevents thieves from simply picking up your bike and walking away with it.
As for a more general tip: the best place to lock your bike is in a public space, right in the middle of a lot of bikes. The more conspicuous and uncomfortable, the better.
What's the Best Bicycle for Amsterdam?
As far as daily use bicycles go, the holy grail of second-hand bikes in Amsterdam (or even new ones, I suppose) is one that works perfectly but doesn't attract too much attention.
The general consensus is that the best bicycle for Amsterdam is an "omafiets" (grandma's bicycle) with the following features:
- Upright sitting position
- Step-through bicycle frame
- Black or similarly generic colour
- Pedal brakes (less maintenance than hand brakes)
- Working front and backlights
- Rear luggage rack with straps
- Enclosed chain guard to keep you dry
- Good tyres with new tubes
- A front rack or basket
Basically, something that looks like this:
A bicycle with all of these features can be hard to find on a budget, but even finding 70% of these features is a good buy.
If you want a brand new one, the Progress Bike Stadsfiets 28 Inch on Bol.com is a great buy at 159€.
Conclusion
The bicycle ecosystem in Amsterdam is a fast-moving one, and there are plenty of options when it comes to buying your first bicycle. It's best to try all the different channels to find a bicycle you like - whether it meets the criteria I've mentioned above, or not - and you should be rolling on two wheels in no time.
Personally, I'd go for a bicycle that's reliable, low-maintenance and understated (to deter thieves), but if you want a flashy new racing bike, that's totally up to you.
On a final note: once you have a bicycle, get yourself a good bicycle lock and a basic multi-tool and puncture repair kit. They really cost next to nothing, and in the long run, will be far cheaper than going to a shop for punctures (it happens to everyone!). And if you don't know how to fix a puncture... it's really easy - YouTube is your friend.
Good luck and happy cycling!
As a country with a rich, diverse history that has since transitioned into an industrial and cultural powerhouse, Germany has a lot to offer to nomads, expats and visitors alike. Few countries allow you to embrace your inner history buff during the day, visit world-class galleries in the afternoon, then head to a club for a multi-day bender with some of Europe's best DJs playing every week. It also helps that Germany is strategically located in the centre of Western Europe with great travel connections by flight, rail and bus.
Also see: How to Travel Like a Local in Berlin (16 Best Apps for iOS and Android)
While buying a SIM card in Germany isn't that difficult, things have become slightly more complicated due to anti-terrorism laws that were passed in July 2017 in response to unrest across Europe.
Don't worry, it's not as bad as it sounds - it's still very easy.
It simply means that part of the activation process is that customers now have to to provide ID for all prepaid SIM registrations. My personal experience with this was rather confusing as I was caught right in the middle of the changeover - but things have become much simpler and smoother since.
In this guide, we'll be running through the three main service providers in Germany, a shortlist of resellers (which are my preference as they offer far better value) and the registration process itself.
In short, I've done all the research - so you don't have to.
Where to Buy a SIM Card in Germany
If you're looking for a local option, I highly recommend winSIM.
Check out the options on winSIM's website
The section you're looking for is "Tarife" in the top menu, and the options listed under "LTE All Tarife". There, you'll see 1GB, 3GB, 6GB and 10GB options. The middle options (3GB and 6GB) are typically the best value and often have flash sales.
The site's in German, but you can easily find your way around by using Google Translate.
At this point, you might be asking why I'm recommending winSIM over the main 3 networks of Telekom, Vodafone and O2. It's a fair question. I'll get to this in the following sections, but the short answer is: resellers offer better value.
Resellers (also known as MVNOs) account for over 40% of market share in Germany, which is one of the highest in the world. And the reason is simple: the main networks don't offer good value, while the resellers do. Of these resellers, I've found winSIM to offer the top pick of them all, offering the best value in terms of unlimited calls and text, the most data per Euro, and no contracts.
I'm not just saying that - I've switched SIM card providers 4-5 times and updated this article dozens of times with updated information since arriving in Germany over 3 years ago, so I'm speaking from experience.
Learn more on the winSIM website (new tab)
As a bonus: since Germany is part of the EU, a German SIM card will also keep you connected all across most of the EU, not just Germany.
Phone Carriers & Networks in Germany
There are three main phone service providers in Germany, and who you choose depends on what you're planning to do, where you're planning to go, and your budget. These three companies are Telekom, Vodafone and O2 (also often referred to as "Telefonica", the parent company).
Here's a quick summary:
| Telekom | Vodafone | O2 |
| Best coverage | Great coverage | Good coverage |
| Fastest speeds | Fast speeds | Fast speeds |
| Most expensive | Middle ground | Best value |
| Resellers (3G only) | Resellers (3G only) | Resellers (3G/LTE) |
All three networks boast about coverage percentages, but in "real life" terms for "most people", it looks like the networks are getting closer every year.
According to the latest Mobile Network Experience Report (May 2020) by Opensignal:
| Download (Mbps) | Upload (Mbps) | |
| Telekom | 38.6 | 13.1 |
| Vodafone | 26.2 | 7.9 |
| O2 | 23.6 | 8.6 |
Additionally, when it comes to 4G/LTE:
| 4G Availability | 4G Coverage | |
| Telekom | 94% | 90.3% |
| Vodafone | 90% | 88.3% |
| O2 | 81% | 80.6% |
In this context, Availability refers to "the proportion of time users with a 4G device and subscription have a 4G connection. For example, a reported 4G Availability of 75%, means that the 4G users were, on average, connected to 4G services on their network 75% of the time".
Coverage refers to "the extent of locations covered and the relative importance of those locations according to the population that spends time in them. This differs from other predictive measures of network service coverage that are based either on population or geography".
What does this all mean?
Basically, you're pretty well covered across Germany - regardless of whose network you're using. The gap between the three networks seems to have significantly closed in the last few years.
So at this point, it's a decision between choosing Telekom, Vodafone and O2, or opting for a reseller.
I've used the O2 network via resellers for the last two years, and have almost always had fast 4G connection. resellers (such as winSIM) also happen to offer the best value and prices, so that's great news for you!
Best SIM Card Companies in Germany
Like many countries, all three networks have resellers which generally offer better value for the average user. Most resellers are on the O2 network, which happens to be the cheapest and also is the only network that consistently offers 4G/LTE as well as standard 3G.
Fun fact: in Germany, these resellers (also known as MVNOs) have one of the highest rates of prepaid market share in the world, at around 40%.
My personal pick out of the resellers (and the one I'd recommend to friends) is winSIM, a reseller based on the O2 network. I've used the O2 network to travel around Germany and Europe - even some truly remote locations - and rarely had any issues and have never experienced a dropout. All the plans typically offer unlimited calls and texts - it just boils down to how much data you're after.
Learn more about winSIM here (new tab)
If you're based in or travelling through Berlin, the O2 network has the added benefit of having coverage in the U-Bahn (the metro and subway) network. O2 is now also the market leader in terms of customers numbers.
Deutsche Telekom SIM Card
Deutsche Telekom, more commonly known as "Telekom" (and previously known as T-Mobile) is the former market leader in terms of customer numbers. Telekom was formerly state-owned, which - like in most countries - means it still has the best coverage in all of Germany for both 3G and 4G/LTE. They're also the most expensive, even on the reseller options. But if reliable coverage in regional areas is your top priority, Telekom is the top pick.
Pros:
- Great coverage
- Best regional coverage
- Fastest network
- EU roaming included
Cons:
- Rather expensive
Popular resellers on the Telekom network include Congstar, Lebara mobile, ja!mobil, and Penny Mobil. Reseller plans often exclude 4G/LTE connectivity, so keep an eye out for this in the fine print if this is important to you.
Vodafone SIM Card
Vodafone holds second place behind Telekom in terms of price, coverage and speed, although resellers often exclude 4G/LTE connectivity. Tethering is also often not permitted, while other resellers don't have the same restrictions.
Pros:
- Great coverage (except in some regional areas)
- Good network speeds
- EU roaming included
Cons:
- Coverage in regional areas could be better
Popular resellers on the Vodafone network include Lycamobile, Otelo, Fyve, EDEKA mobil, and LIDL Connect. Reseller plans often exclude 4G/LTE connectivity, so keep an eye out for this in the fine print if this is important to you.
O2 (Telefonica) SIM Card
O2 (often referred to as "Telefonica", the parent company) is the cheapest network in Germany that also represents the best value for money. Their acquisition of the E-Plus network means they're now the market leaders in terms of customers and have significantly expanded coverage across the country.
Unlike the other two networks, 4G/LTE connectivity is shared with their resellers and they are the only network that covers the entirety of Berlin's U-Bahn (metro underground train) network with 3G and 4G/LTE, which can be a big plus for staying connected while in transit.
Pros:
- Great coverage (except in some regional areas)
- Complete coverage of the Berlin U-Bahn
- Typically the cheapest network in Germany
- 4G/LTE connectivity on resellers
- EU roaming included
Cons:
- Coverage in regional areas could be better
Popular resellers on the O2 network include winSIM (my recommendation), Aldi Talk, Blauworld, NettoKOM, Ortel mobile, AyYildiz, NetzClub, K-Classic Mobil, and Fonic.
Learn more about winSIM here (new tab)
Buying a Prepaid SIM Card in Germany
As of July 2017, all new prepaid SIM card registrations require a form of ID (usually a passport) and a valid German address.
There used to be some oddly specific exceptions to the accepted ID documents during the transition period - for instance, my Australian passport was not a valid form of ID for validation over the phone - but this doesn't seem to be an issue any more. If that doesn't work, I discovered that this same restriction didn't seem to apply when activating in-person at a store or at the post office.
I'd recommend buying a SIM card in advance. Choose from one of winSIM's prepaid SIM card options and get it delivered to your hotel or any other address in Germany. Shipping is free.
Activating it yourself is quite easy, but if you can't figure it out, head to a phone store or electronics chain stores such as MediaMarkt or Saturn to help you with the activation process. Don't forget to have your passport and German address handy, as you'll need this for the verification process.
Buying a Postpaid SIM Card in Germany
The difference between prepaid and postpaid SIM cards is that the latter comes with a contract. That means that you're locked into a monthly fee, usually for 24 months.
If you're just travelling through, this is not for you - but if you're planning on sticking around in Germany for a while, postpaid SIM cards sometimes offer far better value. In Germany, "better value" usually means "more data" and unlimited calls and texts are typically included as standard.
That said, I've found that resellers such as winSIM offer better value, even when compared to postpaid plans. It's strange - I've been looking at getting more value by switching to a contract, but haven't been able to find a better deal and have stuck to winSIM.
Learn more on the winSIM website (new tab)
Activating SIM Cards in Germany
SIM card activation can be done through one of four methods:
- Showing your ID (passport) online by a video verification process
- By presenting a printed "Post Ident" document at a post office
- Through a "Handy" phone shop or electronics chain (MediaMarkt, Saturn)
- Buying directly from a branded store (Telekom, Vodafone, O2 only)
Verification is easy enough to do on your own, so I'd recommend ordering ahead of your arrival. If you have difficulties, take Option 3 or 4 - simply go to a shop and ask for help.
Other than your passport, you'll also need a valid German address to activate your SIM card.
How Much Are SIM Cards in Germany?
From a global perspective, Germany is quite stingy on the amount of data they provide on their plans. Generally speaking, O2 is by far the most generous - but it all comes down to how much you're willing to spend, depending on the amount of calls and data you need.
My pick would be winSIM with 1GB, 3GB, 6GB and 10GB options and unlimited calls/text. They often run sales, but the middle plans (3GB and 6GB) typically offer the best value.
EU Roaming with German SIM Cards
In June 2017, the EU-wide policy of "roam like home" has started to apply to all networks, which means you should be able to use your prepaid plan anywhere in the EU/EEA zone without any additional charges.
Also see: Best Dual SIM Android Phones for Work & Travel
Still, I would recommend limiting the roaming usage to data only, as many companies have interpreted this law as using "credit" as opposed to your "unlimited calls" as this is for national calls only - that is, within Germany only. Some even have unofficial "fair use" limits to the data that can be used abroad.
Countries such as Switzerland are also an often frustrating exception to the EU rule, as they function in a political grey area. This is reflected by phone companies' roaming policies as well.
In short: be sure to read the fine print!
How to Top Up on Phone Credit
All three networks and most resellers provide an online portal where you can top up your credit online. Some other networks - especially those operated by supermarket or retail chains, such as Aldi Talk - also allows you to walk into one of their retail stores to buy a recharge voucher. Either way, topping up phone credit is quite easy to do.
Side note: if you've moved to Germany and need a local bank account (trust me, it makes things so much easier), I highly recommend N26. I tried surviving with only my Australian accounts and cards, and while it was mostly fine, it ended up being a huge hassle at times.
Final Thoughts
Buying a SIM card in Germany is a relatively simple process as long as you have a valid form of ID (such as a passport) and a valid German address (your hotel or residence). If the Post Ident video verification system doesn't work for you, simply head to a cell phone store and bring your ID.
I recommend winSIM to most people as the best value for money option.
If you're only visiting Germany, ship your new SIM card to your hotel or Airbnb a week in advance, and activate it as soon as your arrive - all you need is a passport and address. German SIM cards also work all across most of the EU, not just Germany.
As far as networks and coverage go: Telekom has the best coverage and is the fastest, but they're also significantly more expensive than any of its alternatives. Vodafone and O2 have also caught up a lot in recent years, so the gap is definitely getting smaller.
Personally, I'm a little unsure if Telekom's premium is worth it, as the three networks perform similarly enough in terms of "real world" measurements. I've travelled extensively across Germany and still had good signal throughout, with occasional dropouts near remote lakes and at some points in the countryside - so unless you're really going off the beaten track, you'll be fine with any of the three networks and their resellers (such as winSIM).
Whether it’s minimalism, points hacking, one-bagging or any other term that has now started to enter the mainstream, I’ve been doing all of these in some capacity for over a decade now. The term ‘digital nomad’ is also on the rise, which is also something I’ve largely been doing since 2016. I've since learned that I like having long-term bases, so I now prefer the term ‘location independent’.
All that aside, my point is: I’ve been doing this for a while, and I’ve learned a few things along the way.
Below are just some of the best digital nomad tools that I rely on, albeit with a bias towards Australia and Europe as that’s where I’ve spent most of my time. There are also a few things for North Americans as well, and there are also plenty of tools that can be accessed from anywhere in the world.
Banks & Debit Cards
As I hold an Australian passport and currently am based in Europe, the banking options that I know about naturally skew towards these two regions. That said, I've come to learn about other countries' banking systems over the past decade or so, simply from seeing what other nomads have been saying.
Global: The currency exchange service TransferWise has a banking solution called TransferWise Borderless, which allows you to send and receive six currencies with local banking details (British Pound, Euro, US Dollar, Australian Dollar, New Zealand Dollar, Polish Zloty). This, plus its integration with TransferWise's core service of currency conversion makes this the best solution for people who are location-independent and/or don't have a fixed location.
Europe: N26 for Europe and Monzo for the UK. Both are fee free, with a limited number of free ATM withdrawals - although the terms of this differ depending on where the world you are.
US: Charles Schwab is the top pick. Completely fee free, and they refund all ATM fees from anywhere in the world.
Australia: HSBC, Citibank, ING are all great options. HSBC comes out on top with 11+ currencies on one account, while Citibank is also nomad-friendly without any specific conditions or catches. ING is a good alternative, although perhaps better for Australia-based travellers as you'll need to receive a minimum of $1000 per month and make 5 card transactions to qualify for its benefits.
TransferWise Borderless
TransferWise's currency conversion combined with its 'Borderless' multi-currency account is the only real nomad solution. This has gradually become my go-to global banking solution over the last few years.
Receive: AUD, EUR, GBP, NZD, PLN, SGD, USD
Send: 50+ currencies
Eligible countries: 🌏
Learn more about TransferWise Borderless
N26
N26 is a German digital bank is disrupting traditional banking, with free accounts and operating 100% online. Also integrates with TransferWise. Although N26 is technically EU/EEA only, you can use a friend's delivery address to open an account from anywhere in the world.
Receive: EUR
Send: EUR, 50+ currencies (TransferWise)
Eligible countries: EU/EEA
Monzo

Ever since N26 has decided to exit the UK market, Monzo is probably the next best alternative - another digital bank that is disrupting their local banking sector.
Receive: GBP
Send: GBP
Eligible countries: UK
Charles Schwab

I first heard about Charles Schwab in my early twenties, and have been envious of it ever since. If I were eligible, the first thing I'd do is sign up for a Charles Schwab account. Everything is free, and they even refund local ATM fees.
Receive: USD
Send: USD
Eligible countries: USA
Learn more about Charles Schwab
HSBC

Historically, Australians have been a little left behind in terms of new product offerings. Amazingly, the tables have turned with the HSBC Everyday Global account - one account with zero fees, the official Visa exchange rate and 11 major currencies on one card. It also supports Apple and Google Pay.
Receive: AUD, CAD, EUR, JPY, NZD, GBP, CHF, USD, HKD, CNY
Send: AUD, CAD, EUR, JPY, NZD, GBP, CHF, USD, HKD, CNY
Eligible countries: Australia
Learn more about HSBC Everyday Global
Citibank Everyday Banking

Citibank's Everyday Banking is effectively Australia's Charles Schwab. There are no fees for international transactions and you can take cash out of foreign ATMs at the official Visa exchange rate. Much, much better than exchanging currency at the airport.
Receive: AUD
Send: AUD
Eligible countries: Australia
Learn more about Citibank Everyday Banking
ING Orange Everyday

ING Orange Everyday is also free, refunds ATM fees, a great app, plus a free savings account which happens to be one of the better options in Australia. The catch? You need to receive at least $1,000 and make 5+ card purchases every month. That said, I've also heard that you can simply transfer $1000 to a different bank account and $1000 back into your ING account to get around this requirement.
Receive: AUD
Send: AUD
Eligible countries: Australia
Learn more about ING Orange Everyday
Other Nomad-Friendly Banks
- Monese (UK) also has a good reputation, although Monzo still seems like a better proposition overall - not to mention, they're more established.
- In Germany, DKB is also a good choice, although this is limited to residents.
- Capital One 360 (US) is an alternative Charles Schwab, although they don't refund your ATM fees.
- STACK (CA) is a prepaid Mastercard is the only Canadian option with zero account and ATM fees.
- For Kiwis, Air NZ OneSmart is a multi-currency prepaid card with 3 free international ATM withdrawals per month.
Foreign Currency Conversion
One of the most common mistakes that travellers make has to do with how they get their hands on the local currency. There are three ways to do this without getting ripped off:
- Use a debit card from one of the accounts I've listed above to withdraw cash from local ATMs. These cards typically use the Visa or Mastercard rate, which is always better than using a broker or agent.
- Pay exclusively with debit or credit card, if the country you're visiting is card-friendly. I never use cash when visiting countries such as the US, Canada, Australia, New Zealand and the UK. Most Nordic countries are cashless, as are a lot of big cities in Europe.
- Open a TransferWise account and use their currency converter for one of the best exchange rates around. They'll even give you an estimate of how much money you've saved by using their service.
Never use a physical broker such as Travelex or the currency conversion kiosks you find in airports. This is literally (literally) a waste of money. They operate on margins and commissions, and you'll never get a rate that's even close to fair with any of them them.
TransferWise
This is my only recommendation when it comes to foreign currency exchange. Over the last few years, TransferWise has become the industry standard for travellers, expats and nomads alike. Ask anyone who's done their research, and they'll say the same. It's pretty unequivocal.
Credit Cards
Like the banks and debit cards mentioned about, credit cards that offer fee-free international transactions are a must-have for any traveller or nomad. Most credit cards have a 2-3% international fee. It might not sound like much, but this adds up very quickly and it doesn't make any sense to give your hard-earned money away to a bank.
Some even give you free travel insurance and flight reward points - although I've found that the latter often have fees attached that raises questions about whether it's actually good value for money without spending a fortune.
Bankwest Zero Platinum

If you're Australian, this is the best credit card you can get as a traveller. There are zero fees, free travel insurance when travelling from Australia, a great app, and excellent customer service. Exchange rates are the official Mastercard rate, which is one of the best around. Spend your Australian dollars anywhere without a second thought. Highly recommended.
Currency: AUD
Eligible countries: Australia
Learn more about Bankwest Zero Platinum
28 Degrees Global Platinum

The only downside of the Bankwest Zero Platinum card is that there's a minimum income threshold of $65,000. If you don't qualify, the next best option is the 28 Degrees Global Platinum card. This is usually the first credit card that most young Australians get before they head out on their travels, as it has zero fees and minimal requirements.
Learn more about 28 Degrees Platinum
Other Nomad-Friendly Credit Cards
There aren't a whole lot of credit cards that have this international fee waiver, however, there are other ways you can use credit cards to improve your travel (and life, in general). One word: points.
A lot of banks have bonus points on credit card sign-ups and often waive their fees for the first year. Simply sign up, spend on the card to qualify for the points, and cancel it before the end of the year. Get a new one, rinse and repeat.
I did this successfully with multiple banks in Australia, and this can be done in many other countries as well. This does not have a negative effect on your credit rating - mine actually went up as a result.
Alternatively, look into your spending habits and see if annual fees can be offset with bonus points and benefits such as travel insurance and airport lounges. If your profession requires high spending (e.g. Google or Facebook Ads), you can also connect your credit card with these services to use your ad spend to get additional points. Depending on your ad spend, the accrued points and benefits might outweigh any fees.
Insurance
Nobody needs travel insurance. That's until they do - then they really need it. The number of horror stories I've heard that were thankfully covered by the travel insurance literally is in the thousands, and I've personally also been saved by being insured before my travels.
Generally speaking, World Nomads is a good choice as they cater for travellers from almost any country around the world. I've used them extensively in the past and recommend them to my friends.
That said, if you want to focus on medical insurance from an insurer that focuses specifically on people who lead nomadic lives, SafetyWing is also a good choice. They're also much cheaper than any of the competition and don't charge you upfront - it's a monthly fee that can be cancelled at any time.
World Nomads
The standard for travel insurance. Insurance policies are cheaper if you buy it for longer, so I've often bought a year upfront, and have re-bought every year.
SafetyWing
SafetyWing is the only legitimate choice for those who are truly location independent. Good coverage, no commitment (monthly fees) and they're also a lot cheaper than the competition.
Other Nomad-Friendly Travel Insurance
Check with your home country's insurer to see if they offer travel or medical insurance while abroad. Though not always the case, it could be a cheaper option. If you have a qualifying credit card, their complimentary travel insurance could also be a good choice - just be sure to read the fine print.
VPN
Whether you spend a lot of time using someone else's wifi (e.g. in cafes) or simply want to access Netflix in other countries, having a VPN is a must-have in the 21st century. It's even more important if you're dealing with sensitive information, such as accessing your bank account or logging into your email accounts - it's incredibly easy to get your data stolen while using public wifi networks.
I spent months researching different VPN providers, looking at speeds, security, even where the company itself and its servers are located. Then, I went through a trial and error process for years before settling on NordVPN as my top pick for the best balance of value (it's surprisingly cheap!) while also getting fast speeds and great security. This is what I recommend to everybody, but if you simply want the best, ExpressVPN is the next step up - at a price.
NordVPN

NordVPN is my #1 pick from hundreds of VPNs in terms of speed, reliability, security and price. The longer you sign up for, the cheaper it gets - starting from less than $4 per month.
ExpressVPN

ExpressVPN is at the top of the industry, and it's priced accordingly. I've found NordVPN more than enough for my needs (and all of my work is online!), but ExpressVPN is the upgrade choice.
Other VPN Providers
After months of research and personally testing different VPNs, I haven't found any provider that offers better value than NordVPN, nor have I found one that's a fully-featured as ExpressVPN. Stick with these two.
Websites
Websites are no longer something that's exclusively the domain of nerds and futurists - anybody can make a website in about half an hour. I've tried all sorts of things: Squarespace, Wix, Weebly, and even manually hand-coding websites - and now, rely on WordPress and Oxygen to build my portfolio of websites. Previously, I built sites using Elementor.
My day job is also in digital strategy, specifically around usability design - which means that fast load speeds are also incredibly important. To demonstrate the importance of fast web hosting, here's a question: would you prefer a website that loads in 2 seconds, or in 20? It's that simple.
Similar to VPNs, I've spent years personally testing and building sites on dozens of different hosts and have finally found a winner. If you want the best balance of price, speed and scalability, Cloudways is a no-brainer. If you're only hosting a small site and want some cheaper but also fast and reliable, choose Siteground. Both also have excellent customer service, which is important if you're not a developer or systems administrator.
I used Siteground for about half a decade before moving all my websites across to Cloudways (on Digital Ocean servers) in 2020 - simply to get that speed boost and scalability.
Elementor

While I use Oxygen to build my websites, it's a bit difficult to use for beginners and requires a decent amount of HTML, CSS and Javascript. Don't know what that means? If that's the case, use Elementor. It's a free plugin that turns your WordPress site into a drag-and-drop builder. The Pro version adds a lot of useful features and I used it literally every day.
Cloudways

It's hard to go wrong with Cloudways. It's easy to use, has great customer service, and load speeds are blistering fast compared to shared hosting, even at the lowest price point of $10. Still, it might be a little complicated if you're a complete beginner - in which case, go with the next pick.
SiteGround

For just a few dollars a month, you get award-winning customer service and servers built on Google Cloud. In other words, Siteground is reliable, fast and very affordable. This is probably the best choice if you're just getting started.
Google Suite

Google Suite includes everything you already know: Gmail, Docs, Maps, and more. Connect your custom domain name with G Suite to add an extra level of professionalism.
Learn more about Google Suite*
*20% discount codes: G Suite Basic (Q7XT7LXCFALJLLX) or G Suite Business (W4AJCNVEXKXA6EP.)
Other Web Hosting
If you search for web hosts in Google, you'll likely see a lot of websites mentioning companies such as Bluehost, GoDaddy, and Hostgator. Avoid them all. They're cheap, but with mediocre service and shoddy speeds. Search for "EIG web hosting" and avoid all the companies on that list too.
I've also seen a lot of people recommending Hostinger lately, but I've also seen accusations that they've been paying reviewers huge sums of money to create positive press. They also recently got banned from a web hosting forum that I follow. This is indicative of a lot of reviewers nowadays: they receive referral fees from these companies, so it's in their interest to promote them - even if the service actually isn't that good.
I personally use Cloudways and Siteground, and can vouch for both. I even use them on my clients' websites. Want proof? Click around this website and you'll see that everything loads super fast.
Accommodation
Finding accommodation is one of my least favourite parts of travel, but Booking, Airbnb and Hostelworld makes this a little easier. I've tried a number of other platforms as well, but have always come back to these three as the best combination of price, variety, and a website and app that's actually nice to use.
Some tips: always filter by the maximum number of stars, sort by lowest price, and read all the reviews before booking. The latest reviews are a better indicator of how things are, and checking reviews from around the same season as when you're travelling is a good way to find out about common complaints around seasonal essentials such as aircon or heating.
I particularly like Hostelworld as they have a cleverly-named HOSCAR Awards shortlist, which has never let me down. Even if it's a little pricier, give it a go - some hostels that I've stayed in have been truly remarkable and unique.
Booking.com
My go-to choice for hotels, motels and service apartments. Depending on your mood, this can be better than Airbnb as you get ultimate privacy and freedom.
Search 27+ million listings on Booking.com
Airbnb

Better for unique experiences in real people's homes. Listings are often in neighbourhoods that don't have hotels around, which means you'll get a more local experience as well.
Search 5+ million listings on Airbnb
Hostelworld

Hostelworld is the leading name in hostel bookings. This also means the most number of reviews to look through, and I've found their HOSCAR Awards listings to be a really useful shortcut.
Search 36,000+ listings on Hostelworld
Getting Around
Every region has their own bus, trains and flight networks, but it can quickly get frustrating. Between different languages, currencies and confusing layouts, it's often worth using an aggregator to make things easier for yourself. As a bonus, all of your bookings are in one place - no more digging through hundreds of booking emails!
Skyscanner
I don't even bother going to airline websites anymore, as Skyscanner is easily the best flight aggregator on the internet. Flights here are regularly cheaper than the airline websites, and you can even set reminders around dates and destinations.
Regions: Global
Trainline
I discovered Trainline in 2019 and have since used it to book all of my bus and train travel around Europe. I switched over from GoEuro and find Trainline much nicer to use, often with better prices. They even have rail passes.
Regions: UK/Europe
12Go.Asia

During my time in Asia, I tried booking in person at travel agents, bus depots and train websites - everything. After continuous uncertainty and paying too much at every turn, I've found 12Go.Asia. This is your one-stop online shop that has the most comprehensive coverage of Asia, which makes searching for buses, trains and even flights a breeze.
Regions: Asia
RentalCars.com

I've rented more than my fair share of cars, and I recently realised that Rentalcars.com is cheaper than booking directly through a car rental company's website. Very strange. They also offer a best price guarantee, plus zero cancellation or amendment fees.
Regions: Global
Berlin attracts freelancers, digital nomads and start-up types from all around the world. It’s easy to see why – the whole city is filled with creative energy and the acceptance of the wild, weird and wacky makes it the perfect playground for creators.
And it's thanks to this demand from the growing international community, freelancers and adopted cafe culture that is really starting to mature the cafe scene in Berlin. After a couple of years of being based here, I've put together a my list of some of best cafes in Berlin for freelancers where you might find me hunched over, precariously holding a coffee and carrot cake over my laptop.
For freelancers looking for a great cafe in the Neukölln and Kreuzberg area, Prachtwerk, Refugio, Wilke, Laidak, Myxa, The Visit, Nah am Wasser, and Bonanza Coffee Roasters are all worth a visit.
It was tempting to keep these to myself, but the original article started getting more attention than I expected, so I’ve since updated the list with my new regular spots.
Also see: Ottonova Review: Health Insurance for Freelancers & Expats
Just a quick note: I love cafe culture, so it’s more important to me that their owners do well. Please be considerate when working from cafes – especially the smaller ones – and support them by buying a few things whenever you can. Don’t be that person who sits with a single coffee for hours on end and gets laptops banned from yet another cafe!
Prachtwerk, Neukölln

Prachtwerk is an event space that also operates as a cafe during the day. It seems like they have no problem with freelancers coming in and working from the space - almost everybody has a laptop open in front of them, mostly solo but also small groups.
It's very spacious and there's often free seats, so you never feel like you're taking up too much space - although that's not an excuse to purchase a few things now and again to support them. They used to have some wifi issues, but this seems to have been sorted out now. Coffee is decent and not too expensive, making Prachtwerk a reliable spot to get some work done.
Address: Ganghoferstraße 2, 12043 Berlin (Google Maps)
Closest U-Bahn: Rathaus Neukölln (U7)
Social media: Facebook / Instagram
Refugio, Neukölln

Refugio is a cafe and living space that supports refugees, whom they call "new Berliners". I've been aware of Refugio for quite a while, but never actually went in. I'm glad I did!
The staff are mostly volunteers and refugees, and are always very welcoming. There's usually plenty of seating around and is relatively uncrowded, although there's the occasional family or tour group that might come in and hang around for a while. A nice bonus: if you're learning German, this might be a good place to practice as people will be patient with you - and it's also a great opportunity to help refugees with their conversational English.
Refugio also runs regular community events which I'd highly recommend checking out.
Address: Lenaustraße 3-4, 12047 Berlin (Google Maps)
Closest U-Bahn: U Hermannplatz (U7, U8)
Social media: Facebook / Instagram
Wilke, Neukölln

For a long time, Wilke was my secret spot – delicious brunch and cakes, friendly service and my favourite coffee in Berlin. Wilke is the result of a Boddinstraße local’s ambition to recreate Australian cafe culture right on the street that she grew up on. I’d say she succeeded, and more.
As a Sydneysider living with two Melburnian housemates just a couple of doors down, we became regulars at Wilke, coming in at least a few times a week. Complementing the coffee and food options, the space is also beautifully minimal and cosy. Turns out that the interior was designed and built by the owner, Carolin, and her dad. Lovely.
This is probably my favourite cafe in Berlin. I’ve since moved away and while I love my new area, knowing that I wouldn’t have Wilke nearby was a sad realisation.
Address: Boddinstraße 10-11, 12053 Berlin (Google Maps)
Closest U-Bahn: Rathaus Neukölln (U7)
Social media: Facebook / Instagram
Laidak, Neukölln

Laidak used to be one of my locals just up the road, a sort of mix of cafe, bar and political event space. It’s got some proper grungy Kneipe vibes, but the regulars are quite young – although you do see the occasional group of grizzled Berliners smoking up a storm in the far back corner. It’s a local and unpretentious place, transitioning from coffee to beers as the day goes on.
Before I found more permanent working digs, I ended up here at least a couple of times a week. The wifi is decent and there’s usually at least a few people working here at any given time, but try not to take over an entire table to yourself. Be considerate and be willing to share.
Address: Boddinstraße 42/43, 12053 Berlin (Google Maps)
Closest U-Bahn: Boddinstraße (U8)
Social media: Facebook / Instagram (tags)
Myxa, Neukölln

I’m not sure if Myxa is technically Kreuzberg or still Neukölln, but either way – it’s great. A friend recommended Myxa to me about a year ago and it quickly became one of my regular spots. It’s not too busy for the first couple of hours that it’s open, so I tend to try and get there early and leave before the rush starts – although it’s also a great spot to transition into lunch as well.
Myxa also becomes a bar later into the night, but it’s definitely not as grungy as Laidak and it attracts more of an expat crowd that spills over from Weserstraße. You’ll hear a lot more English here, but I’ve also heard the staff speak Greek, Spanish and – if I’m not mistaken – occasionally even some Dutch.
Address: Lenaustraße 22, 12047 Berlin (Google Maps)
Closest U-Bahn: Schönleinstraße (U8)
Social media: Facebook / Instagram (tags)
The Visit, Kreuzberg

The Visit’s entrance is tucked away on Adalbertstraße, barely visible from the street. Keep an eye out for the large white “we have coffee” neon sign, follow it down a small alleyway and you’ll find yourself in a little oasis amidst the chaos of Kottbusser Tor.
It’s a little pricey, but you’ll feel right at home as you quickly blend in with a dozen other caffeine-fueled freelancers. Coffee’s not bad either. Seat yourself on one of the many tables, a high chair in the corner, or on the amphitheatre-style seats near the door that might bring flashbacks to your university days.
Address: Adalbertstraße 9, 10999 Berlin (Google Maps)
Closest U-Bahn: Kottbusser Tor (U1, U3, U8)
Social media: Facebook / Instagram
Nah am Wasser, Neukölln

This is one of the first cafes I stumbled across when I arrived in Berlin the second time around and is still one of my favourites, whether it’s for getting some work done or to catch up with friends. There’s a dedicated outdoor area which is amazing in warm weather, and the decor of the indoor space is beautiful.
The coffees are great and the cakes are delicious. They also dish out some serious foodporn in the form of brunch and lunch. Highly recommend.
Address: Kiehlufer 55, 12059 Berlin (Google Maps)
Closest U-Bahn: Rathaus Neukölln (U7)
Social media: Facebook / Instagram
Bonanza Coffee Roasters, Kreuzberg

I’d heard a lot about Bonanza from other cafe hoppers, so I thought I’d finally give it a try. There are several locations, but my closest one is the one on Adalbertstraße, in the middle of Kottbusser Tor, Görlitzer Bahnhof and Heinrich Heine Straße U-Bahn stations.
I’m updating this article right now from the long table (behind where the photographer would be standing in the photo above). As you’d expect, it has great coffee and good wifi in a tastefully designed space with muted colours, lots of wood and greenery. I'll be coming here more often in the coming months.
Address: Adalbertstraße 70, 10999 Berlin (Google Maps)
Closest U-Bahn: Kottbusser Tor (U1, U3, U8)
Social media: Facebook / Instagram
Special Mentions
These cafes are my current favourites, but I also like:
- CAMON Coffee
- Isla Coffee
- Karl Says Relax
- K-Fetisch
- Populus (for the decor and pastries)
- Klunkerkranich (during the day)
I’ve also been meaning to visit 19grams Schlesi and Leuchtstoff Kaffeebar, and occasionally I head out of my Kiez to Oslo Kaffebar and Westberlin, though it's been a while since I've been. Sadly, my old favourite - Betahaus Cafe - is no longer open.
If you have any other places for me to check out, let me know in the comments! And once again, don’t be "that guy" who buys one coffee and stays for hours. Support your local cafes and buy something!
The city of Heidelberg is one of the best-preserved examples of German Renaissance architecture from before World War 2, and is one of my favorite places in Germany.
Central to Heidelberg are the bridges running over the Neckar River, surrounded by romantic cityscapes, and some of the best hospitality experiences I’ve had in Germany. It’s also home to an unusually large number of internationally renowned research facilities and has a long history in the arts, particularly in literature.
I could happily spend days or even weeks hanging about the riverbanks, sitting in the cute cafes or even simply walking up and down the main shopping street — surprising, for someone who doesn't really like shopping.
Getting to Heidelberg
Heidelberg hosts a fair number of travellers all year round, but the fact that it doesn’t have an airport perhaps explains why it hasn’t yet exploded into the hordes of tourists that fill other German cities such as Berlin, Munich or Frankfurt.
The easiest way to get to Heidelberg from abroad is to fly into Frankfurt Main Airport (not Frankfurt Hahn), and take a train or bus. Both the train and bus take about an hour and a half to reach Heidelberg. The train costs around 25-30€ and the buses are between 5-16€, however, the buses are a direct connection so this might be a better option for most people.
For both international and domestic flights, I use and recommend Skyscanner, while Trainline is my go-to for buses and trains around Europe.
Alternatively, you can rent a car and drive from Frankfurt. The drive to Heidelberg takes about an hour and this allows you the flexibility of exploring the region around Heidelberg. We did the second time around, also visiting France and the Mercedes-Benz and Porsche Museums in Stuttgart.
In Europe, I always use AutoEurope to rent cars as they offer the lowest rates and exceptionally affordable excess insurance. Their customer service is also often far better than speaking directly to the car rental companies, and they will often communicate and mediate on your behalf.
Where to stay
The first time I stayed in Heidelberg, I was Couchsurfing with three students near the Altstadt. I had an amazing time there, but obviously this isn't for everyone — and especially not for a family trip. But shelling out serious money for a fancy hotel isn't our style either.
After hours of research, I found Rafaela Hotel in the Neuenheim district. It turned out to be the perfect option: fairly priced, wonderful staff, comfortable rooms with huge windows (from which you can see the local farmers market) in a beautiful area, literally a minute's walk from amazing restaurants and cafes. Absolutely ideal for couples but also for single guests, who would receive a slightly cheaper rate.
I found the best rates for Rafaela Hotel on Booking.com.
As the Neuenheim district is a more upmarket neighbourhood of Heidelberg, you'll find a slightly more affluent crowd here — but it's not pretentious, so you can keep your sneakers on. It's also a quieter area, on the opposite side of the bridge where the main streets and crowds are. That said, you can walk into the thick of everything in about ten minutes. I preferred to walk around the city, but the Bismarckplatz tram stop will also take you anywhere you'd like to go.
Where to park
Another plus for Rafaela Hotel is that they can provide street parking tickets that cost 5€ per day, which is valid in all of the nearby residential parking areas until noon the following day. Guests can purchase an unlimited number of these from the reception.
Alternatively, you can find covered parking in one of the parking lots nearby. The closest one is called Nordbrückenkopf with a maximum fee of 14€ for 24 hours. If you're parking for longer, you can alternatively "lose" your ticket and get a new one for 25€. You can find a full list of parking locations and the number of currently free spots on the Heidelberg parking website
Things to do
My personal opinion is that there isn't really a stand-out landmark or activity as such in Heidelberg. The whole city is just really nice. That said, here's a list of things to do in Heidelberg over 24 hours (and beyond).
Walk across Karl Theodor Bridge
Get yourself a delicious coffee and breakfast at NOMAD Neuenheim, just around the corner from Rafaela Hotel.
From Rafaela Hotel, you'll naturally do this to get to the main part of the city. Also known as the Old Bridge, walking across Karl Theodor Bridge and along the riverbanks alongside it are the best way to start getting acquainted with the beauty of the city. I would highly recommend doing this whenever you have time — between sightseeing or even after dinner for a night time walk.
Explore the Altstadt: Hauptstraße & Heidelberger Marktplatz
Upon reaching the Bismarckplatz tram stop, head left and towards the Altstadt (translation: "old city") through the Hauptstraße (translation: "main street"). Here and in the narrow streets alongside it, you'll find shops, bars, cafes and restaurants.
I'm not big fan of shopping in general, yet for some reason, I found this street strangely charming in its own right. Perhaps it has something to do with the selection of stores that are available. You won't find a Gucci or Louis Vuitton here, but that's not to say that there aren't nice things — there are plenty of more upmarket German and European stores as well as a good mix of international stores.
Head on all the way until the Heidelberger Marktplatz, before making your way towards Heidelberg Castle.
This area is full of both tourists and locals, and you'll see an eclectic mix of people and hear a variety of languages as you make your way down and closer towards Heidelberg Castle.
Head up the hill to Heidelberg Castle
Grab a bite to eat on Hauptstraße and prepare yourself for a little bit of a walk towards Heidelberg Castle.
Heidelberg Castle is the most noticeable landmark of the city, towering over and visible from most parts of the city. It was famously featured in the opening lines of Mark Twain's essay "The Awful German Language" and provides a great look into the German Renaissance style of architecture. The essay itself is actually an enjoyable read, especially if you have ever cried tried or are in the process of learning German.
If you don't want to walk all the way up, the Bergbahn is an old railway that will take you to the castle atop the hill. I personally preferred to walk both times, but the price for the castle is the same at 8€ per person whether you take the Bergbahn or not.
It'll take you at least a couple of hours to properly see everything inside the castle and the gardens, which is also a perfect place to take in the panorama of the city from nearly a hundred metres above. The first time I came here, I spent nearly four hours hanging out in the garden and looking over the city. It's also a great place to read a book or simply relax.
Next on the list
At this point, you might not have so much time left before sunset and you begin to start thinking about dinner and winding down. But if you're still keen to do more or have additional days in Heidelberg, here's a quick list of other things to do and places to go.
- Walk down the Philosophenweg (Philosopher's Way) through the beautiful Philosophengärtchen (Philosopher's Garden).
- Continue through the Philosophenweg up towards the Thingstätte.
- Go to the Heidelberg Zoo, a zoo that actively priorities conversation and breeding programs for endangered animals. It's a member of the European Endangered Species Program (EEP). The nearby Botanischer Garten is one of the oldest botanical gardens in Germany and also worth a visit.
- For more indoor activities, have a look at the Pharmacy Museum and Kurpfälzisches Museum.
Personally, I'd recommend simply walking around to soak in the vibe of the city, sitting by the river and people watching in the Altstadt.
Food and drink
Maybe it's a regional thing, but I've always found the people in Heidelberg to be very friendly, and this translates to their hospitality as well. In particular, Dorfschänke was a standout, with traditional German food made with seasonal ingredients and locally sourced wines. The service was great too — we went back twice after the first night.
Restaurant Rossini was also excellent. We all had the special of the day with fresh fish and pasta, and our server was perfect — attentive but unobtrusive, with smiles and funny stories in between. I've also never seen four people manage a restaurant of that size so calmly and professionally.
I also spent some time wandering around the Altstadt and went into a few bars and they were all thoroughly enjoyable, although unfortunately, I can't remember their names. To be fair, I don't think I ever had any bad food or drink experiences in Heidelberg — everything has always been high quality and overall great experience.
Proof of onward travel is a common yet frustrating question that you might get asked for when you’re travelling into a new country. This is especially the case if you're travelling with flexible plans, and don't necessarily have your next country planned (or booked) yet.
Proof of onward travel is usually requested when checking in at the airport, however I’ve also heard some stories of a few people who have been asked for proof of onward travel while crossing land borders, Basically, it's evidence that you'll be leaving the country before your visa expires, usually in the form of a flight ticket to another country.
The easiest way to bypass proof of onward travel? Rent an onward ticket.
This is the simplest and most reliable method (although there are other ways too). Read on to learn more about proof of onward travel and your options.
What is proof of onward travel?
In short, proof of onward travel is evidence that you will be leaving your destination country. This is usually a return flight ticket or another flight ticket to your home (or next) country. A land border crossing in the form of a bus or train ticket is usually accepted as well, but I’ve heard quite a few stories of airport staff specifically asking for a flight ticket.
Proof of onward travel is required by some countries for all sorts of reasons, but in general, it’s to make sure that:
- You have enough money to leave the country.
- You intend to leave the country before your visa expires.
- You don’t intend to stay in the country (illegally).
If you think about it, using proof of onward travel to determine one of the above scenarios doesn’t seem like a particularly bright idea, but for now, it’s best to treat it as just one of those old, bureaucratic rules that haven’t yet been updated.
Proof of onward travel seems to be requested more often in South East Asia (probably due to the high volume of expats doing monthly visa runs). I've also been questioned when flying into the UK as well. The airport staff sometimes get it wrong as well — I’ve once had to argue my way onto a flight from South Korea to Vietnam, which doesn’t require proof of onward travel.
What counts as proof of onward travel?
A flight ticket out of the country you're visiting is the best proof of onward travel. Technically, bus or train tickets should be accepted as well, but a flight ticket is your safest bet as this is what border control is used to. If you're not sure, you should try and find an official source (e.g. the government website of the country you're visiting) or play it safe with one of the options below.
The cheapest and most surefire way is to rent a ticket.
What countries require proof of onward travel?
Countries that definitely require proof of onward travel include Peru, New Zealand, the United Kingdom, the United States, Philippines, Indonesia, Brazil, Costa Rica and Panama.
My personal experience of being asked for proof of onward travel was flying into Thailand. I was also asked for proof when flying to Vietnam, but I did my research and found that proof of onward travel was not needed. I showed my evidence to the check-in desk at Bangkok Airport, and they finally let me through.
I tried digging around some more to find a more comprehensive list, but couldn't find one — not to mention, it probably changes from time to time. Renting a ticket alleviates this uncertainty altogether, but if you want to check your destination's government resources — more power to you!
How to get proof of onward travel
My first experience with a request for proof of onward travel was when I flew with a one-way ticket from Sydney to Thailand several years ago. I intended to catch an overnight bus into Cambodia before my one-month visa expired, but I wasn’t sure when — so I didn’t have a ticket yet.
Thailand requires an onward ticket, and I didn’t want to pay for one. So, like any self-respecting digital native of the 21st century, I went to the internet to find answers. And as always, the internet delivered: with hundreds of pages of conflicting advice from self-proclaimed “experts”, hare-brained theories and generally inconsistent anecdotes.
Not exactly the clarity I wanted. Thanks, internet.
So, what are your options?
1. Risk it and smile
While it’s possible that you won’t be asked for proof of onward travel at the airport, it’s a good idea to be prepared on the off-chance that it might happen. Life is full of unexpected surprises: tour taxi to airport could be late, there could be traffic… and you might get denied entry when boarding your flight.
This leaves you with no choice but to book an onward flight (or follow one of the options below), and if you’re short on time, you might end up missing your flight altogether. The alternatives are so simple that there really is no point in risking it.
Verdict: high risk, not recommended.
2. Create a fake ticket confirmation
If you’re a Photoshop whiz, you can try editing an old email confirmation from another airline or travel agent. Just make sure that the flight number and departure times of the flight you’ll be “boarding” actually exists!
Alternatively, you can start the booking process with some airlines and take a screenshot of the check-out screen. Some creative cropping will result in a document you can keep on your phone to show at the gate.
I’ve met a lot of people that advocate this approach, but personally, I’m not a fan. While it’s highly unlikely that they’ll actually check the details at the gate, this method leaves you vulnerable to accusations of knowingly forging official documents. And let’s be honest: that’s exactly what you’ve done. You’ll have almost no options to defend yourself and completely at the mercy of the airport official.
Verdict: high risk, not recommended.
3. Buy a flexible date ticket
Another legitimate way of skirting around the onward travel rules is to buy a ticket where you can change the flight dates. The issue is that flexible date tickets are often significantly more expensive, especially if you compare it against local airlines that offer flights that are inflexible but are also half the price (or less).
Verdict: expensive.
4. Buy a cheap throwaway ticket
While this can be expensive, it's the most legitimate way to beat the system. In fact, this is what most process-abiding airline staff will tell you if they find you don’t have an onward ticket.
In a nutshell, this method requires you to buy the cheapest ticket possible to a nearby country, while still being within your visa period. I’ve also heard of people getting by with a cheap bus or train ticket between countries, although it seems like there have been mixed results with this approach. Still, this strategy is expensive — not to mention wasteful.
Verdict: unnecessary, expensive and wasteful.
5. Hold a flight ticket for 24 hours
All US airlines (and some online travel agencies) are also required to offer a 24 hour “hold” period. With this method, you can reserve a ticket at a certain price for 24 hours. You’ll be issued with a confirmation email, which you can show to the airport staff if asked.
This was my personal preference for a while as it’s completely free, however I’ve heard stories of some people having their flight reservations questioned at the airport. It’s hard to say whether they got unlucky or the airports have become wise to the act, but this method is still a relatively low risk way of bypassing proof of onward travel. If all else fails, combine it with method #6 or #7 if you’re challenged at the airport.
Verdict: low risk, but not foolproof.
6. Buy a refundable flight ticket
In the United States, all airline companies are required by federal law to provide a complete refund on all bookings within a 24 hour period. This means that you can book any flight at random, use it to get into your destination country as “proof of onward travel”, then get all your money back.
Just make sure you process the refund before the 24 hour refund period expires!
The best way to do this is to pay by credit card to avoid dipping into your savings, or even better, to use your frequent flyer miles. All US airline companies should honour the 24 hour refund period, however there has been some chatter about American Airlines phasing out this option. To make sure you’re not going to stuck with a $1000 flight across the world, make sure you do your research: read the fine print before booking and make sure you have enough time to cancel before your 24 hours are up.
Verdict: low risk, but could be expensive if you don't cancel in time.
7. Rent an onward ticket
There are a number of services that allow you to rent a ticket for a small fee. At first, these services were using the “hold a flight ticket for 24 hours” method which made them rather unnecessary, but they have since become more sophisticated. When you present your flight number and details at the airport desk, you will now actually show up on airport systems — making this a legitimate way of having peace of mind.
As far as these services go, the self-titled Onward Ticket website is a good place to get yourself an onward ticket. At the time of writing, renting a ticket costs $12.
Verdict: highly recommended.
Final thoughts
Proof of onward travel is an inconvenience that travellers will have to face at one point or another, so it’s good to be informed and have a plan before you end up stuck without being able to board your flight.
The simplest way to avoid any headaches is to simply rent a ticket, but if you’re game, either holding a 24 hour reservation or refunding a flight ticket within 24 hours is also an option. Just be prepared in case an over-zealous airport official keeps asking questions.
If asked why you’re holding (and not buying) the ticket, you can simply say you’re waiting to see how price changes, or that you simply forgot. Make up an excuse. If they won’t get off your case, simply book the ticket on the spot. Just be sure that you can process the refund in time!
Whichever method you decide to use, don’t forget to smile and be friendly to all airport staff. Simply being nice can get you free seat upgrades, less questions, and even in one case, an exemption when I tried to bring 12kg of carry-on luggage onto an airline with a 7kg maximum.
If you have other strategies or experiences, I’d love to hear from you!
Whether it's ride-sharing or currency exchange, I've curated a list of apps and services that make your life infinitely easier. As a bonus, I've also included coupons and referral codes so you get a little something (free stuff!) when you sign up.
Below, you'll find out how to manage your money, get around and even get food delivered when you're lying in your room with a hangover from last night.
If you think I've missed anything, let me know in the comments below!
Currency exchange
You've arrived and need access to cash - in this case, Euros. I'd highly recommend sorting yourself out with an international fee-free card before leaving home, but if you ever find yourself in need of Euros, check out TransferWise.
They offer the cheapest currency exchange rate on the market - much more so than your average bank. TransferWise even offers a "Borderless account", a multi-currency virtual bank account from which you can receive and transfer funds in multiple currencies. And it's free. Use this link to sign up, and once you're all done, you can also access your account from your iPhone or Android device.
Online banking
If you're actually moving to Berlin and need a local bank account, check out N26. It's the leading digital bank in Germany with easy setup, no fees, free ATM withdrawals, and everything is in both English and German.
People typically don't have much nice to say about banks, but N26 seems to be the exception - I've barely met anyone who doesn't have an account with them. Not sure? Check out my N26 review.
Open your free German bank account with N26 by clicking here.
Using public transport
Now that you have your shiny new bank card (or cards), we can really start moving. While many Berliners spend a lot of time in their own local areas (called "Kiez"), the fact is that the city is quite spread out and you'll often have to take public transport to get around.
The official BVG FahrInfo Plus app (iOS/Android) is an easy way to buy tickets from your phone using a credit card, which saves you the hassle of stopping at ticket machines every time you get on the U-Bahn.
They can even show you the connections you need to take and give you updates if there are delays or any other issues getting around, although personally I prefer to use Google Maps.
Taxis and ride sharing
The often annoying thing about Berlin's public transport system is that it's rare that you get to your destination without any transfers, meaning a 15 minute bicycle ride might turn into 35 minutes on two trains and a bus. If you can't be bothered waiting around, there's a number of options available for you.
Note: almost all of the options below have referral codes, which means that you (and me) will get free or subsidised rides. Let's share the love!
BerlKönig (iOS/Android) is a ride-sharing shuttle service operated by the BVG, first starting out as a replacement service for late-night travellers (Berlin's public transport doesn't run 24 hours) and now operating around the clock. It's much cheaper than taking a taxi and if you use the code chris7i3 you'll get 10€ credit - which is usually enough for two rides! The catch is that you might pick up an extra passenger or two on the way to your destination, but it usually doesn't take you too far out of your way. In fact, most times I've used Berlkönig, it's basically been a private shuttle.
The other option is CleverShuttle (iOS/Android), an eco-friendly shuttle service that only operates electric and hydrogen-powered cars. It operates in a similar way to Berlkönig with the added bonus of being better for the environment, and you can get 10€ credit here as well by using the code p721ea.
Both Berlkönig and Clevershuttle often have deals and specials, which you need to be signed up for to be notified.
If you just want a direct trip, you can also use Uber (iOS/Android) as you would anywhere else in the world - although Uber is technically banned in Germany, so might be getting a taxi instead of a private car. Use the code chrisl2739 to get 10€ off your first ride.
If you don't want to mess around with sharing, the taxi app FREE NOW (iOS/Android) has you covered. They also have taxi vans that can take up to 8 people, which can be helpful if you're travelling in larger groups. Use the code chris.lim1 to get a 10€ coupon.
Car sharing
Car sharing has slowly been taking off across the globe in past years, and Berlin is no different. There are quite a few options as far as companies go but WeShare DriveNow, Car2Go and Miles are the four main options to consider.
WeShare (iOS/Android) is my new favourite, with a fleet of electric VW Golfs and hands-down the best prices of any car-sharing company in Berlin. WeShare is 1€ to start a drive, then costs 19 cents per minute. Unless you predict heavy traffic (which case Miles might be slightly better), WeShare has consistently been the most cost-effective option for me - and their cars are comfortable, clean and pleasure to drive. Use this link to get 20€ in driving credit.
DriveNow (iOS/Android) is operated by BMW and costs 29€ to register, between 20-36 cents/minute depending on the model and time of day, and a 1€ comprehensive insurance fee. Alternatively, you can choose one of four package options, such as hourly, daily or prepaid. Check out the DriveNow pricing page for more details. To get discounted registration (9.98€) and 15 minutes of free driving, use the coupon code N4720LJBS6M7.
Car2Go (iOS/Android) is operated by Daimler - that is, Mercedes Benz and Smart cars - and costs 9€ to register, between 19-39 cents/minute depending on the model and time of day, and a 1.90€ drop-off fee within the main city ring of Berlin. They also have package options - check out Car2Go's pricing page for more details. To get free registration and 10€ credit, use the code J18_R_EN/[email protected].
For both options, you use the app to find your nearest vehicle and can also drop them off wherever you like within the main city limits. As of March 2018, DriveNow and Car2Go have teamed up to become "ShareNow", but you still need both apps to access each network of cars.
Then, there's my second favorite: Miles (iOS/Android). The difference between Miles and everybody else is that they charge by kilometer rather than minutes. This means you don't have to rush across the city and stress about finding parking - take your time and enjoy the drive. Prices start from 0.79€ for a small hatchback to €1.19 for a transporter van (great for moving furniture). Check out the Miles pricing page for more details and use the coupon code qbXIJfwa for 10€ credit when you sign up.
If you want a car for a full day or longer, Drivy by Getaround allows you to rent cars from other people around the city. Some cars have even registered for "Drivy Open", which means you can access the car without even having to message the owner - although your account needs to be verified first. Use this link to get 30€ off on your first rental.
Scooter sharing
Although I do enjoy cycling around Berlin, my favourite way to get around the city for slightly longer distances is by the electric scooters provided by Coup and Emmy.
Coup (iOS/Android) is my preferred choice due to its simplicity: it costs 0.21€ per minute. Use the code REF-UAB4-WYGQ for 3 free rides when you first sign up. The scooters are seemingly everywhere, feel very light and manoeuvrable, and the acceleration is quick enough to beat most cars from a red light.
Emmy (iOS/Android) comes with the added bonus of a second helmet with each scooter, which means that you can carry a passenger and split the costs. The pricing is slightly more confusing though: there's a 10€ sign-up fee which includes 50 minutes, then once your ride credit has run out, the price per minute is 0.23€. There are fewer Emmys available compared to Coup and they do feel a little clunkier in general to drive, but they're a great option when you're driving two people. Use the code i1XF5TFj to get an additional 15 minutes for free.
Both Coup and Emmy have easy-to-use apps, and insurance is included as standard. The only downside is that that you need a European driver's license to register. They both also offer discounted minutes if you buy them in bulk.
Bike sharing
When it comes to bike-sharing, Berliners are spoiled for choice.
I used to rely on Deezer Nextbike (iOS/Android) simply because they're everywhere and are full-sized. Deezer costs 1€ for 30 minutes, which is about standard for bike-sharing in Berlin.
My new favourite pick is Donkey Republic (iOS/Android) as their app is far more reliable and their bikes are even better than Nextbike. They also get cheaper the longer you use them, from 1.50€ for 15 minutes to 10€ for a full day. You can also rent bikes for up to a week.
It seems Mobike (iOS/Android) can be found almost everywhere you look in Berlin, which is the only reason I'd suggest it as a backup option. While they also have the occasional full-sized bikes available, standard Mobikes tend to be quite small for most people and it can be a real struggle to get anywhere fast. Still, they're all right in a pinch.
Food delivery
It's easy to get a little carried away in Berlin, whether it's one of the many bars that cover the city, or that one casual Späti beer that suddenly becomes ten. If you're feeling a bit rough around the edges and don't feel like facing the world, food delivery services such Lieferando have you covered. At the time of this article, Deliveroo has since pulled out of Germany and Foodora was acquired, so these are no longer options for Berliners.
Buying second hand
If you ever find yourself in need of a new phone because you broke yours while travelling (been there), or to buy a new backpack because the one you brought with you simply wasn't cutting it (also been there), it's handy to know what the locals use to buy and sell second-hand goods.
The name to remember here is eBay Kleinanzeigen (iOS/Android), which is Germany's version of Craigslist or Gumtree. Otherwise, there are a number of Facebook groups such as Sell Your Stuff Berlin.
Vietnam is one of my favourite travel destinations in the world, where the crazy chaos of its major cities exist alongside beautiful country landscapes, unspoiled beaches and even the odd desert. It's also home to some of the best street food in the world, much of which is extremely difficult to find outside of the country - or even outside of certain cities. The absence of Hanoi's "bun cha" makes me sad every time I walk into a Vietnamese restaurant in Europe... but I digress.
Like a lot of other countries in recent years, buying a SIM card in Vietnam has become slightly more difficult in recent years. While it's still possible to buy a SIM card from corner stores and the makeshift stalls you can find at the airports, these aren't officially sanctioned and you run the risk of having your SIM card being cancelled or deactivated after a few days.
The only "proper" way to get a SIM card is to buy yours from an official company store. You can spot these by the company logo on the front of the store and uniformed sales assistants (and sometimes by the loud electronic music coming out of huge speakers in front of the store - don't ask why).
Also see: Best Dual SIM Android Phones for Work & Travel
In this article, we'll run through the three main service providers in Vietnam (plus the fourth, much smaller provider), how to choose, and of course, the registration process.
What are your options?
There are three main SIM card providers in Vietnam, which are Viettel, Vinaphone and Mobifone. There's also a fourth provider called Vietnamobile, but I personally wouldn't recommend them at this point in time as their coverage isn't quite up to scratch outside of major cities.
Here's a quick summary:
| Viettel | Vinaphone | Mobifone |
| Best coverage | Great coverage | Good coverage |
| Fast speeds | Fast speeds | Fast speeds |
| Very cheap | Very cheap | Very cheap |
| Roaming in Laos/Cambodia | No free roaming | No free roaming |
The short version summary is that Viettel and Vinaphone are about the same in terms of coverage and speeds, but Viettel takes the edge in terms of rural areas. These two providers are what I'd suggest you stick with. Mobifone has patchy coverage in rural areas, and Vietnamobile's mobile internet is unusable if you leave major city centres.
Viettel
Viettel is the market leader in Vietnam, owned and operated by the Ministry of Defence. This also the network of choice for the Vietnamese Army, which is a great endorsement for anyone thinking of buying a SIM card in Vietnam. If you plan to travel around the country, this should be your first choice.
Pros:
- Best coverage in Vietnam (3G/4G/LTE)
- Best regional coverage in rural areas
- Free roaming in Laos and Cambodia
- Reasonably priced
Cons:
- Not much
Viettel has the best 3G coverage in Vietnam, even in extremely rural areas. To top it off, they’ve covered 95% of the country with 4G/LTE towers – making it the market leader in terms of both customer share and coverage.
Vinaphone
Vinaphone is also government-operated, this time by the Vietnam Posts and Telecommunications Group. They’re the second largest carrier and the local partner of Vodafone in Vietnam, holding 30% market share of the country. While Viettel still has the edge, Vinaphone has good network coverage and speeds across most of Vietnam.
Pros:
- Great coverage in Vietnam (3G/4G/LTE)
- Great regional coverage in rural areas
- Reasonably priced
Cons:
- No free roaming
If you can’t find a Viettel store, Vinaphone is a reasonably good second choice.
Mobifone
Mobifone holds around 20% market share of the country and is currently in the process of becoming privatised, which may mean improvements in the future. It was possible to roam onto the Vinaphone networks up until early-2018, but this appears to have been shut down. This makes Mobifone the third-place provider in Vietnam with somewhat patchy coverage across regional areas.
Pros:
- Good coverage in Vietnam (3G)
- Reasonably priced
Cons:
- 4G/LTE network needs some work
- Patchy regional coverage
- No free roaming
Note: if you’re staying in Vietnam for a shorter period of time (less than a week or two), special tourist SIM packages are available. I personally think the regular packages are still better value, but be sure to ask if you’d like to get more details.
How to buy a SIM card in Vietnam
As of November 2016, the Vietnamese government started enforcing registration rules for SIM cards more seriously, which resulted in tens of millions of numbers being deactivated.
This means that any SIM cards that the airport vendors and corner stores might sell are at risk of being deactivated a few days after you’ve handed over your money. The only people who can legally register a SIM card to your name are the official company stores operated by Viettel, Vinaphone, Mobifone, and so on.
Also see: Best Dual SIM Android Phone for Work & Travel
That being said, a large number of people that I know that are living in Vietnam have not had an issue with their number being deactivated, so it’s up to you whether you want to take the risk of buying a SIM card off the first person you see.
To find an official company store, simply head to Google Maps and type in the provider of your choice. Once you’ve found a store that’s close by to your location, make sure you’ve packed your passport before heading over, as this is a requirement for the registration process.
My experience has been that all shop assistants are very helpful and speak English quite well, regardless of where you are – so you shouldn’t have any major issues with asking questions about which SIM card package to get.
The monthly SIM cards typically offer far better value and more data, especially when compared to the “tourist” packages. Be sure to ask questions if you’re not sure what you’re getting into.
Once you have your SIM card, all you need to do is open up the SIM card slot (usually located on the side or under the battery) and pop in the new one.
How much are SIM cards in Vietnam?
Since Vietnam’s networks are typically owned and operated by the government, there’s very little price competition between the three major carriers. Since this is the case, I’d suggest going with Viettel as they have the best coverage and speeds. Vietnamobile is cheaper option, but I wouldn’t recommend it as you’re seriously sacrificing quality – and SIM cards in Vietnam are very cheap to begin with.
So, how cheap is cheap?
At the time of this article, Viettel’s 5GB data plan with 4G/LTE costs 125,000 VND. That’s about US$5-7. The same 5GB with 3G only costs the equivalent US$3.
The SIM card itself sometimes have a fee too, usually to the equivalent of a dollar or two. This means you get 5GB of 4G/LTE data per month for under 10 dollars.
So – very cheap.
How to top up your prepaid credit
To get more data credit (or to get phone calls as well), simply head into a company store. Some kiosks and corner stores might be able to help you out as well, but I prefer going to an official store to get mine directly from the company.
If you buy a top-up off the street, they’ll give you a receipt with instructions on how to recharge your SIM card – in Vietnamese, of course. But if you ask, most sales assistants should be happy to do it for you.
SIM cards are getting easier to obtain all around the world, but few make it as easy as tech-savvy Thailand.
It's a country of beautiful beaches, amazing food and stunning landscapes, bringing in millions of tourists every year. And the fact is that almost all of these visitors experience some sort of scam during their time there - whether it's getting ripped off at the markets, the infamous tuk-tuk tours, or simply buying a local SIM card. It's all part of the experience!
Also see: Best Dual SIM Android Phones for Work & Travel
Having the right information is the best strategy to stay on top of the hilarious, organized chaos that Thailand has to offer, so today, we'll be covering everything you need to know about buying a SIM card in Thailand.
What are your options?
There are three main companies in Thailand, and who you choose depends on what you're planning to do, where you're planning to go, and for how long. These three companies are AIS, Dtac and TrueMove.
Here's a quick summary:
| AIS | Dtac | TrueMove |
| Best coverage | Great coverage | Good coverage |
| Slowest speeds | Fast speeds | Fastest speeds |
| Reasonably priced | Most expensive | Least expensive |
| Free* wifi hotspots | Paid wifi hotspots | Free wifi hotspots |
*only on the more expensive packages
I've tried all three networks for the purposes of this article, and my personal preference is TrueMove - but read on to see what suits you best.
AIS
AIS is the largest company in Thailand with the biggest market share of customers. In terms of pricing, they're in the middle ground between Dtac and TrueMove, but their 4G/LTE networks are almost non-existent and the speeds aren't that great. Still, they have the best coverage across the entire country, so if you're planning to leave the main tourist areas, AIS is a good choice.
Pros:
- Great coverage
- Reasonably priced
- Free hotspots on the more expensive packages
Cons:
- No 4G/LTE
- Relatively slow speeds (3G)
- No free hotspots on the cheaper packages
Dtac
Dtac is a good balance between great coverage and network speeds, and is the network choice for many tech-savvy travellers. However, they're also the most expensive - the 299 Baht package that gets you 4GB on TrueMove gets you 2.5GB on Dtac. Their hotspots also aren't free, even if you're a paying customer. But if you can afford it, Dtac is a great choice that has the best of both coverage and network speeds.
Pros:
- Great coverage
- Fast network speeds (4G/LTE and 3G)
Cons:
- Most expensive of the three networks
- No free wifi hotspots (but still quite cheap)
TrueMove
TrueMove is the cheapest network in Thailand, has the fastest 4G/LTE and 3G, and has thousands of free wifi hotspots all around the big cities. In Bangkok, it's almost impossible to find somewhere without a hotspot - in fact, the first draft of this article was written using a TrueMove hotspot. The downside of TrueMove is the coverage: it's not as comprehensive as Dtac, and definitely not as good as AIS - but you'll have no problems if you're heading to popular destinations such as Chiang Mai and even Pai.
Pros:
- Fastest network speeds (4G/LTE and 3G)
- Free wifi hotspots for all packages
- Cheapest network in Thailand
Cons:
- Coverage could be better in rural areas
Note: if you're staying in Thailand for less than seven (7) days, all three networks have special tourist packages for around 299 Baht for 1-1.5GB data. These can be found at the airports, convenience stores, branded company stores and most resellers.
How to buy a SIM card in Thailand
If you're flying into Thailand, the easiest way to buy a SIM card is the pick one up at the airport. The only problem is that some of these stores only carry the tourist packages and not the month-long SIM cards. If that's the case, I'd generally recommend holding off until you reach the city.
Buying a SIM card is a simple process, and the shop you buy it from should be able to set up everything for you. Most shops will have sales staff that speak great English, and they should be able to guide you from start to finish.
All you need to bring are the following:
- Your passport
- 49 Baht for the SIM card
Your choice of data package
The monthly SIM cards offer far better value and more data, so if you're staying for longer than a week, your best bet is to find a branded company store. Keep an eye out for a big logo and (often) bright company colours with dozens of staff walking around inside.
Once you have your SIM card, all you need to do is open up the SIM card slot (usually located on the side or under the battery) and pop in the new one.
Also see: Best Dual SIM Android Phones for Work & Travel
A problem that you might encounter is a sales staff member telling you that the SIM card you want is "out of stock". Other stores might even try to tell you that 7-day SIMs are the only option for tourists - this is simply not true.
If you run into this issue, simply try another store and ask for "one month SIM card with data" until someone can help you out. I found it rather odd that so many stores didn't have SIM cards (which is their main product, after all) - but this is just one of many strange things that you'll encounter during your time in Thailand.
How much are SIM cards in Thailand?
The SIM card itself is 49 Baht, but the more confusing part is figuring out which data package to get. Data packages typically range from 199 to 599 Baht, though there are some more expensive options as well.
I generally recommend the 399 Baht option, which should be more than enough data to get you through a month.
This will get you:
- AIS: 3GB
- Dtac: 2.5GB
- TrueMove: 4GB
Once you have a SIM card, make sure you hang onto it until your next visit to Thailand to avoid paying the 49 Baht SIM card fee again.
How do WiFi hotspots work in Thailand?
The sales staff that's helping you set up your SIM card should be able to give you more specific information, but getting yourself set up with wifi hotspots around the city is a simple process. Keep in mind that hotspots for AIS customers are limited to the most expensive packages (from memory, 499 Baht and above), while hotspots are totally free for all TrueMove customers.
If you're planning to get some work done, TrueMove is probably your best bet. A lot of digital nomads that spend a lot of time in Thailand vouch for TrueMove for this reason (and so do I). In city hubs, it's difficult to find a place that doesn't have the ".@ TRUEWIFI" hotspot name on your list of available wifi connections.
Using one of the hotspots on TrueMove is as simple as checking your text messages for an automatically generated 4-digit passcode, and using this with your phone number after connecting to the network. Within seconds, you'll stop using data and start using TrueMove's wifi hotspot - completely free of charge.
How to top up your prepaid credit
To get more data credit (or to get phone calls as well), simply head into a company store. Some kiosks and corner stores might be able to help you out as well, but I prefer going to an official store to get mine directly from the company.
If you buy a top-up off the street, they’ll give you a receipt with instructions on how to recharge your SIM card – in Vietnamese, of course. But if you ask, most sales assistants should be happy to do it for you.
As both a travel hub and one of the top destinations in Asia, you'd think that Thailand would make it easy for foreigners to get money from ATMs — but sadly, this wasn't my experience. Since 2014, most of the local banks charge a 200 baht fee for all withdrawals, which is about the price of five meals from a street stand!
So after weeks of getting ripped off, I did my research and found two options for avoiding ATM fees in Bangkok.
Counter withdrawals from a Thai bank
Some travellers that I met in Thailand (and some blogs) have reported success with withdrawing cash from their debit card from various Thai bank branches.
I've been told that while some banks will try and charge you the 200 baht fee anyway, keep trying until you find someone who's willing. They're not meant to charge a fee — but like a lot of things in Bangkok, you're at the risk of being ripped off if you don't know what you're doing.
I never needed to try this due to the next method, but I can see how it might be useful — especially if you're somewhere else in Thailand (without Citibank ATMs) and need cash.
Find a Citibank ATM (no fees!)
There are three Citibank ATMs scattered around Bangkok, often attached to an actual bank branch. These are fee-free for foreign cards, but make sure that you have a debit card that doesn't charge international fees!
As an Australian, I picked up a Citibank debit card years ago. Aside from prepaid traveller's money cards (which are super expensive in their own way), this is the only debit card offered by Australian banks that doesn't charge fees for international transactions or for using foreign ATMs. If you're a traveller from the US, I've heard great things about Charles Schwab.
This is the Citibank at Interchange 21 at Asok that I frequented during my second long-term stay in Bangkok:
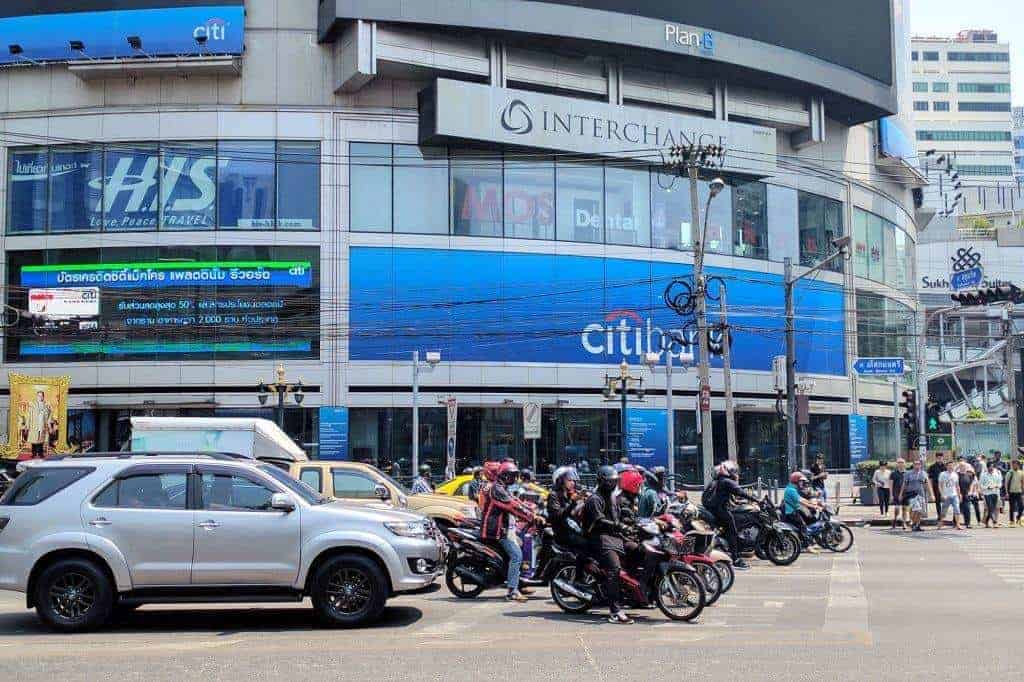
And this is the transaction record from using the Citibank ATM in Central World:

Crunching the numbers with the exchange rate at the time, I discovered that my conversion of $189.31 to 5000 Baht was almost identical to the official rate found on XE.com (a difference of less than 25 cents).
I would find it hard to believe that any non-bank currency exchange company could offer a rate that even comes close to this exchange rate, especially after including the standard commission or transaction fee! After years of travelling, I've only come across one currency exchange (in Amsterdam) that offered anywhere near reasonable rates.
Citibank ATMs in Bangkok can be found at the following locations:
To find this map on the Citibank website, go to this link and search for "Bangkok".
The Citibank website lists the following addresses, but don't try to Google them — it doesn't really work. To make it easier for you, I've found the correct locations that you can find by clicking on the relevant link.
CentralWorld Citibank ATM
The CentralWorld Citibank ATM is in the far corner of the fourth floor of CentralWorld, near all the other bank branches. The shopping centre is big, so if you get lost, ask the information desk and they should be able to point you in the right direction.
Address: 4th floor, CentralWorld, Rajdamri Road, Pathumwan Sub-district, Pathumwan District, Bangkok
Interchange 21 (Asok) Citibank ATM
The Interchange 21 Citibank ATM can be found in the building with the huge Citibank sign (see photo above). If you're facing the sign, it's on the left, next to Family Mart. It's a little tucked away, so if you can't find it, go inside Interchange 21 and ask the bank branch for directions.
Silom Citibank ATM
The Silom Citibank ATM is relatively easy to find as it's right on the road. Have a look at the photos (or Street View) on Google Maps to see what the building looks like before heading over.
Address: 323 United Center Building, Silom Road, Silom Sub-district, Bangrak District, Bangkok
Other options for cash withdrawals
Personally, the CentralWorld and Interchange 21 Citibank ATMs were the closest by for me, and I withdrew money multiple times with no issues whatsoever.
I've heard some reports that there is also an ATM in Chiang Mai, but other sources have reported that this is either false or the branch has been closed down. So if you're starting your trip from Bangkok, I'd recommend heading to a Citibank ATM as soon as possible and withdrawing some Baht before heading off. Bangkok is right in between Thailand's northern and southern tourist locations, so it's even possible to schedule in a pit stop halfway through your trip.
If you can't find a Citibank ATM and the counter withdrawal isn't working for you, you might just have to accept the fee. Still, not all ATMs are equal!
AEON Bank is a Japanese bank that charges a slightly lower fee at 150 Baht compared to the standard 200.
Krungsi Bank allows you to withdraw up to 30,000 Baht each time, which is the largest amount of any ATM in Thailand. Most ATMs allow around 20,000. If you're going to pay the fee, you might as well try and minimise the number of times you need to withdraw cash from the ATM!
Other ways to save money in Thailand
Use card. Since it's safer to avoid carrying too much cash, it's a good idea to try and use your credit or debit card (without international fees, of course) whenever possible. Street vendors won't accept card, but you might have better luck at cafes, restaurants and bars.
Pay in local currency. If you're paying by card, the shop owner might ask if you want to pay in the local currency or in your home country's currency. If your card doesn't have international fees, always choose local. In-store conversions usually incur a fee, or a subpar conversion rate. If you play your cards right (sorry, couldn't help myself), you might earn some airline miles as well.
Bargain, but within reason. Don't haggle over 10 Baht at a street food stand. Seriously, don't be that guy. But if you're getting a taxi or buying a pair of elephant pants, start with the assumption that they're overcharging and bargain to your heart's content.
Book bus and train tickets online. After spending a month of booking tickets through local travel agents, I realized that tickets are far cheaper online since prices are non-negotiable and don't charge huge commissions. 12Go.Asia covers all of South-East Asia and shows you the prices for not only buses, but even trains, taxis and flights — all in one search. Booking in advance also tends to be cheaper, so be sure to check out the 12Go.Asia website before you set off.
Get a Wise Borderless account. Previously known as TransferWise, the Wise Borderless account lets you receive ten currencies (GBP, EUR, USD, AUD, NZD, SGD, RON, CAD, HUF, TRY), hold and convert 56 currencies, and spend internationally in over 200 currencies — completely fee-free.
Safe travels!